> ## Documentation Index
> Fetch the complete documentation index at: https://koreai-apis.mintlify.site/llms.txt
> Use this file to discover all available pages before exploring further.
# Add RingCentral Engage as a Channel
[Back to Available Channels](/ai-for-service/channels/adding-channels-to-your-bot#available-channels)
To set up **RingCentral Engage** as a channel, you must complete the following steps:
## Add the Host URL
1. Copy-paste the **HOST URL** from **RingCentral Engage** to the Platform.
2. Provide it in the **Channels & Flows** > **Channels** > **Digital** > **All** > **RingCentral Engage** > **Configurations**.
## Generate API Access Token
1. Login to your **RingCentral Engage** developer account. The URL specific to your company will be available after creating a paid account with RingCentral Engage.
2. Navigate to the **Admin** section and click the code snippet icon on the left navigation menu.
3. Select **API Access Tokens**.
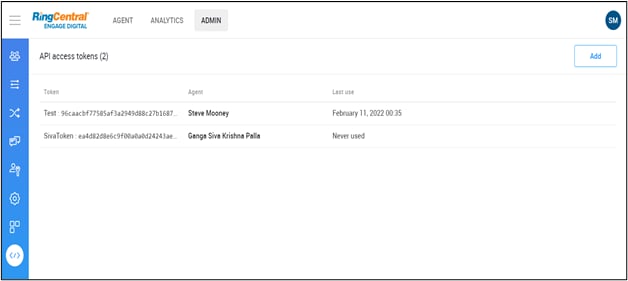
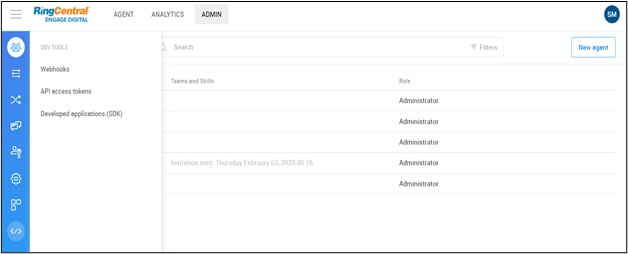 4. If there are any tokens present already, you can use them or click **ADD** to generate a new API Token.
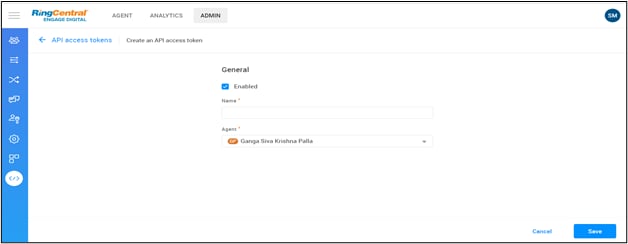 5. Provide a **Name** for your API Token.
6. Select **Agent** from the drop-down list.
7. Click **Save**.
8. Navigate to the **API Tokens** screen and select the **Edit** icon to land on the screen shown below where the generated API Access Token appears.
5. Provide a **Name** for your API Token.
6. Select **Agent** from the drop-down list.
7. Click **Save**.
8. Navigate to the **API Tokens** screen and select the **Edit** icon to land on the screen shown below where the generated API Access Token appears.
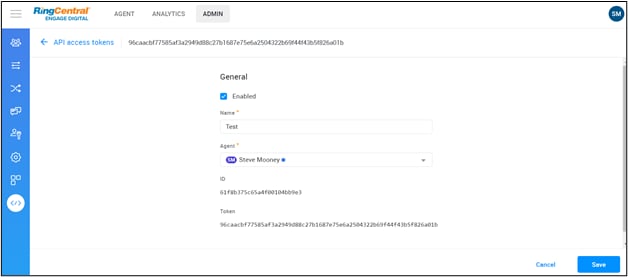 9. Copy and provide the generated **API Access Token** under **Channels & Flows** > **Channels** > **Digital** > **All** > **RingCentral Engage** > **Configurations** on the Platform.
## Setup Webhook Configuration
1. Once the API Token has been generated, navigate to **Admin > Webhooks**. Click the **code snippet** icon on the left navigation menu, and select **Webhooks**.
9. Copy and provide the generated **API Access Token** under **Channels & Flows** > **Channels** > **Digital** > **All** > **RingCentral Engage** > **Configurations** on the Platform.
## Setup Webhook Configuration
1. Once the API Token has been generated, navigate to **Admin > Webhooks**. Click the **code snippet** icon on the left navigation menu, and select **Webhooks**.
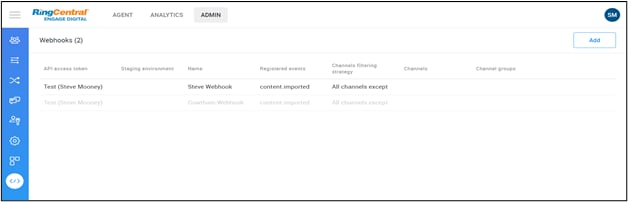
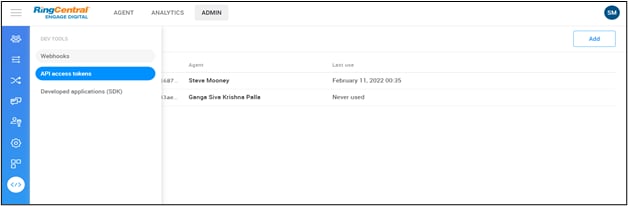 2. If any webhook configurations are present already, you can use them or click **ADD** to generate a new webhook configuration.
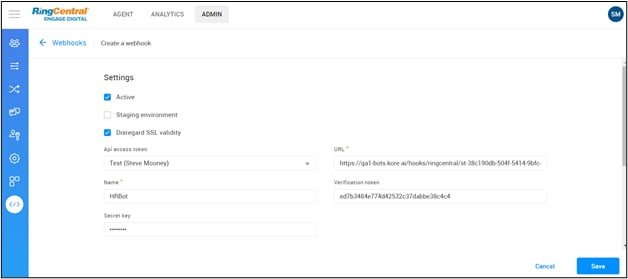 3. Select the **API Access Token** generated.
4. Copy the **URL** from the Platform under the **RingCentral Engage** channel and paste it to the above webhook configuration screen.
5. Provide a **Name** for the configuration.
6. The Verification Token will be generated automatically.
7. Copy the **verification token** and paste it in the **RinCentral Engage > Configurations** section of the Platform.
8. Provide any unique **“Secret Key”** of your choice.
3. Select the **API Access Token** generated.
4. Copy the **URL** from the Platform under the **RingCentral Engage** channel and paste it to the above webhook configuration screen.
5. Provide a **Name** for the configuration.
6. The Verification Token will be generated automatically.
7. Copy the **verification token** and paste it in the **RinCentral Engage > Configurations** section of the Platform.
8. Provide any unique **“Secret Key”** of your choice.
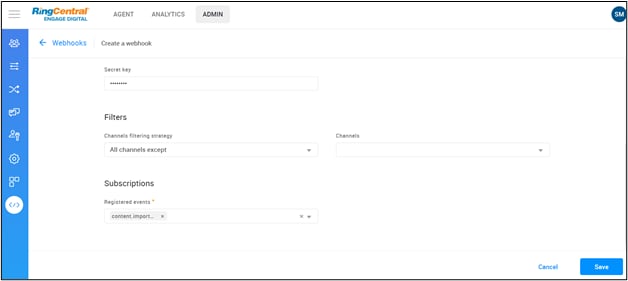 9. Select the Channel you prefer or select all the channels if the message is to be delivered on all the channels.
Please refer to this [link](https://support.ringcentral.com/engagedigital/admin/configure-entry-points.html) for more information on how to configure channels.
## Subscribe to events for message delivery
1. Select the **content. imported** event under the **Subscriptions** section.
2. Click **Save**.
Make sure to check the Active option before you save. This will establish a handshake between RingCentral Engage and Platform by sending a 200 code to RingCentral on successful connection establishment.
9. Select the Channel you prefer or select all the channels if the message is to be delivered on all the channels.
Please refer to this [link](https://support.ringcentral.com/engagedigital/admin/configure-entry-points.html) for more information on how to configure channels.
## Subscribe to events for message delivery
1. Select the **content. imported** event under the **Subscriptions** section.
2. Click **Save**.
Make sure to check the Active option before you save. This will establish a handshake between RingCentral Engage and Platform by sending a 200 code to RingCentral on successful connection establishment.