> ## Documentation Index
> Fetch the complete documentation index at: https://koreai-apis.mintlify.site/llms.txt
> Use this file to discover all available pages before exploring further.
# Configuring the ServiceNow Agent - Tokyo and Lower Versions
The ServiceNow Agent integration allows you to hand off AI Agent conversations to live agents on ServiceNow. This guide covers configuration for **Tokyo** and lower versions.
***
## Configuration Steps
* [Step 1: Retrieve the ServiceNow Instance URL](#step-1-retrieve-the-servicenow-instance-url)
* [Step 2: Create a New Queue](#step-2-create-a-new-queue)
* [Step 3: Enable the ServiceNow Agent](#step-3-enable-the-servicenow-agent)
* [Step 4: Switch to UI16 Theme](#step-4-switch-to-ui16-theme)
* [Step 5: Install Required Plugins](#step-5-install-the-required-plugins)
* [Step 6: Create a User with agent\_admin Role](#step-6-create-a-user-with-agent_admin-role)
* [Step 7: Create a Group and Add the User](#step-7-create-a-group-and-add-the-user)
* [Step 8: Define the Host URL in the REST Message](#step-8-define-the-host-url-in-the-rest-message)
* [Step 9: Define Outbound REST Message Requests](#step-9-define-outbound-rest-message-requests)
* [Step 10: Define Outbound REST Business Rules](#step-10-define-outbound-rest-business-rules)
* [Step 11: Testing Configuration](#step-11-testing-configuration)
***
### Step 1: Retrieve the ServiceNow Instance URL
1. Log in to your ServiceNow account with admin credentials. The URL format is: `https://devXXX67.service-now.com`.
2. Copy the Instance URL for use in Step 3.
### Step 2: Create a New Queue
1. Log in to your ServiceNow account.
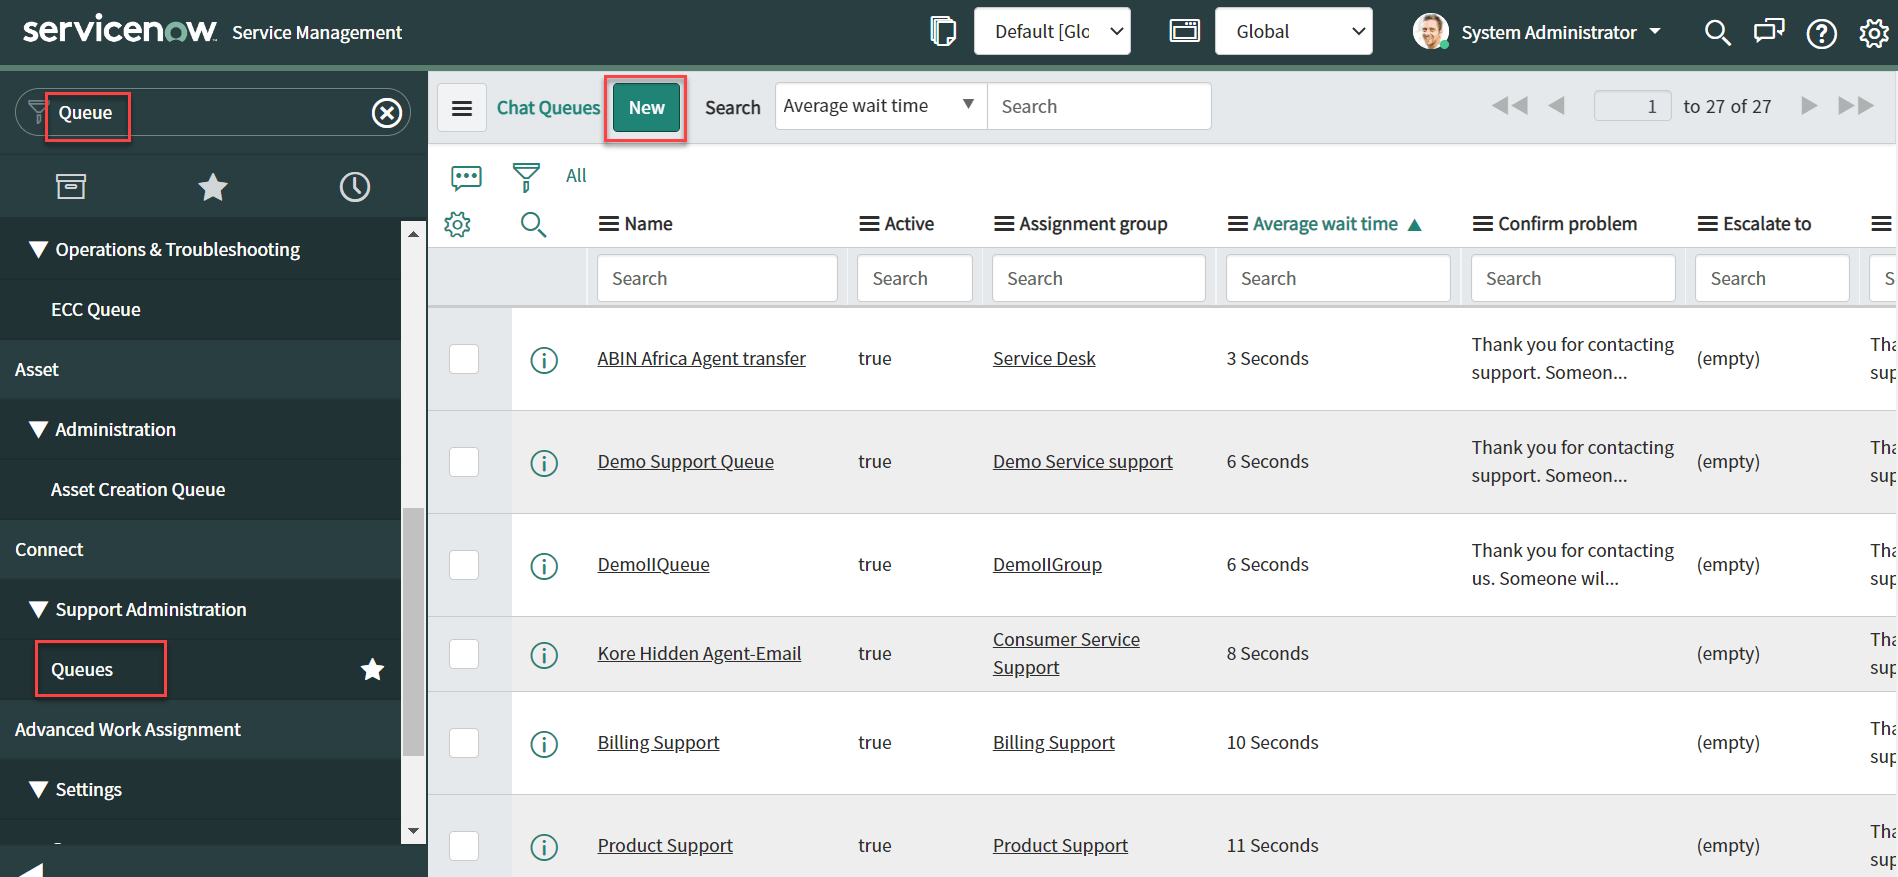
2. Navigate to **Connect > Support Administration > Queues** and click **New**.
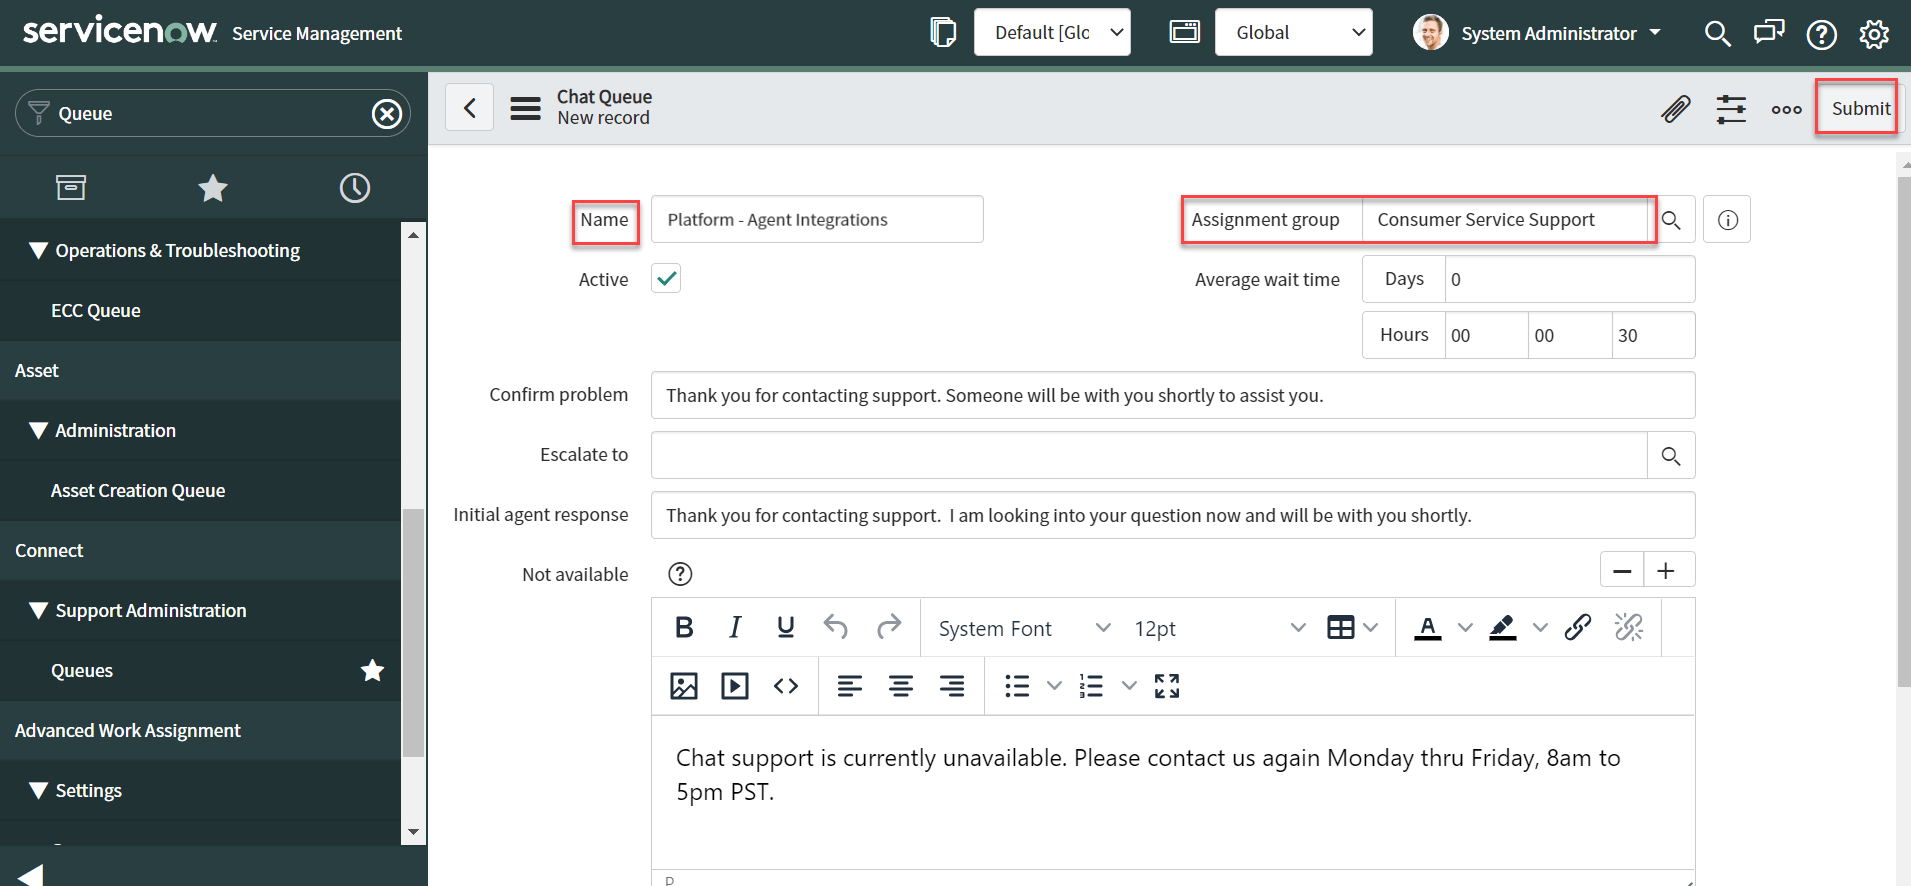
 3. Enter the queue **Name** and select **Consumer Service Support** in the **Assignment group** field.
 4. In the **Chat Queue Entries** section, click **New** and assign a user.
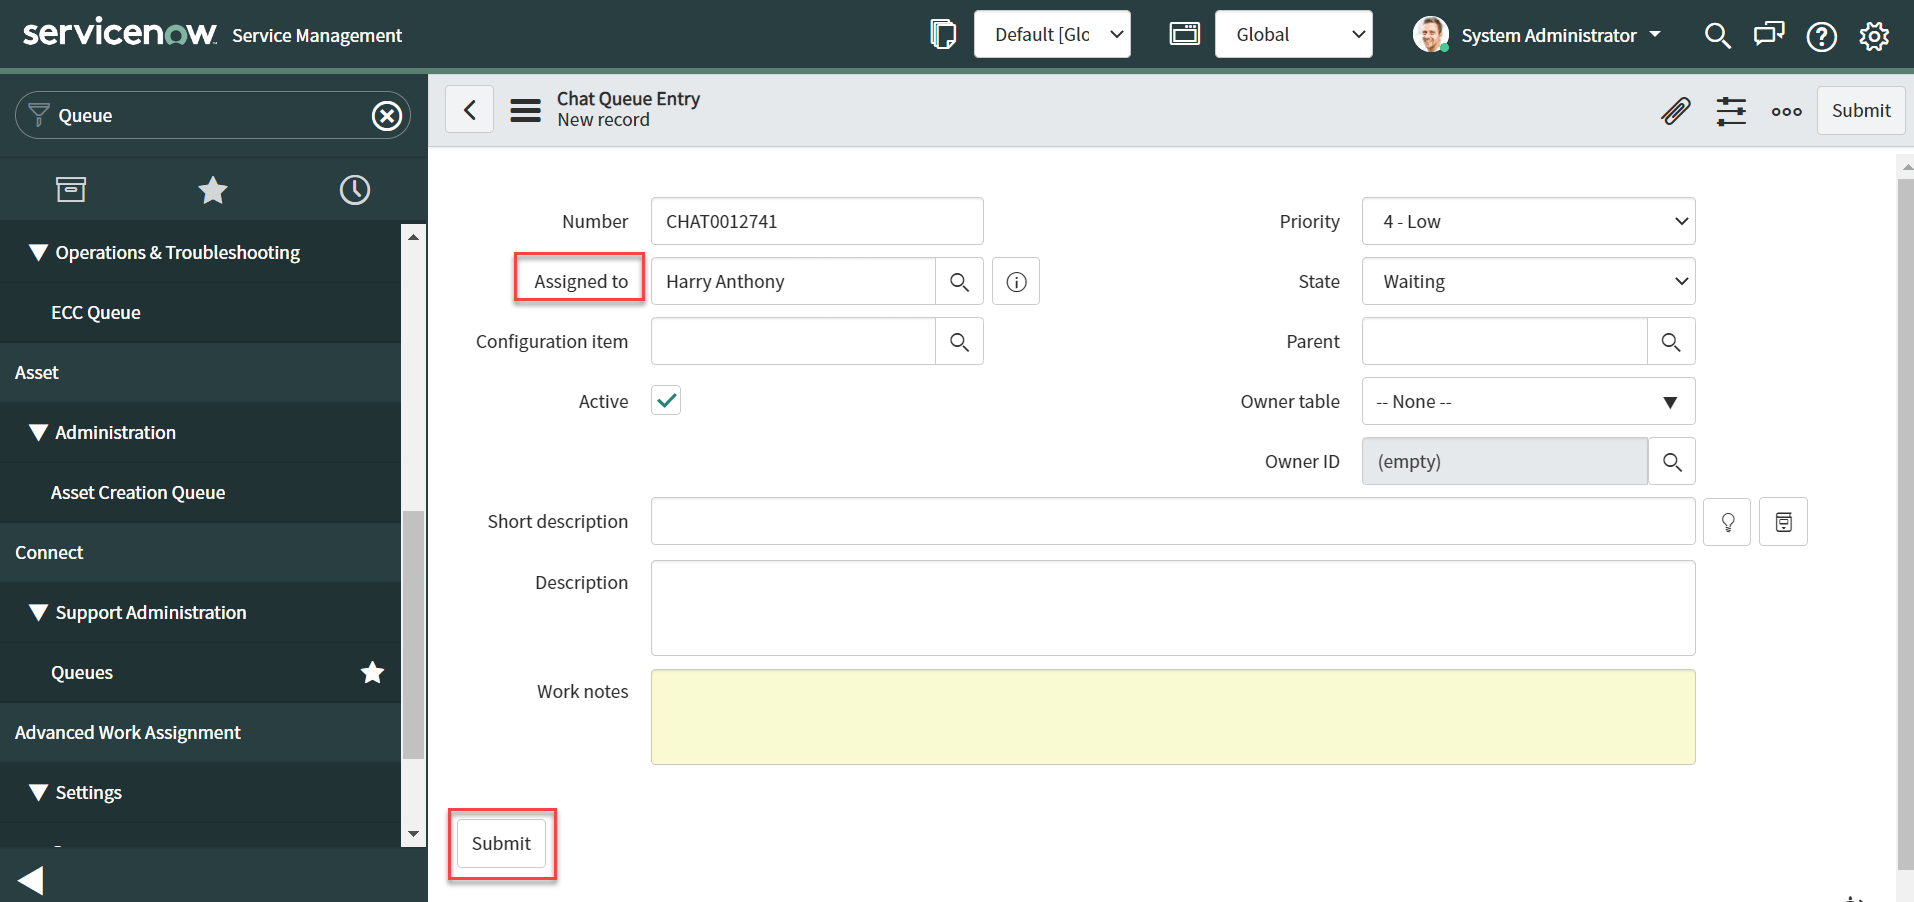 5. Click **Submit** to save the queue entry, then **Submit** again to save the queue.
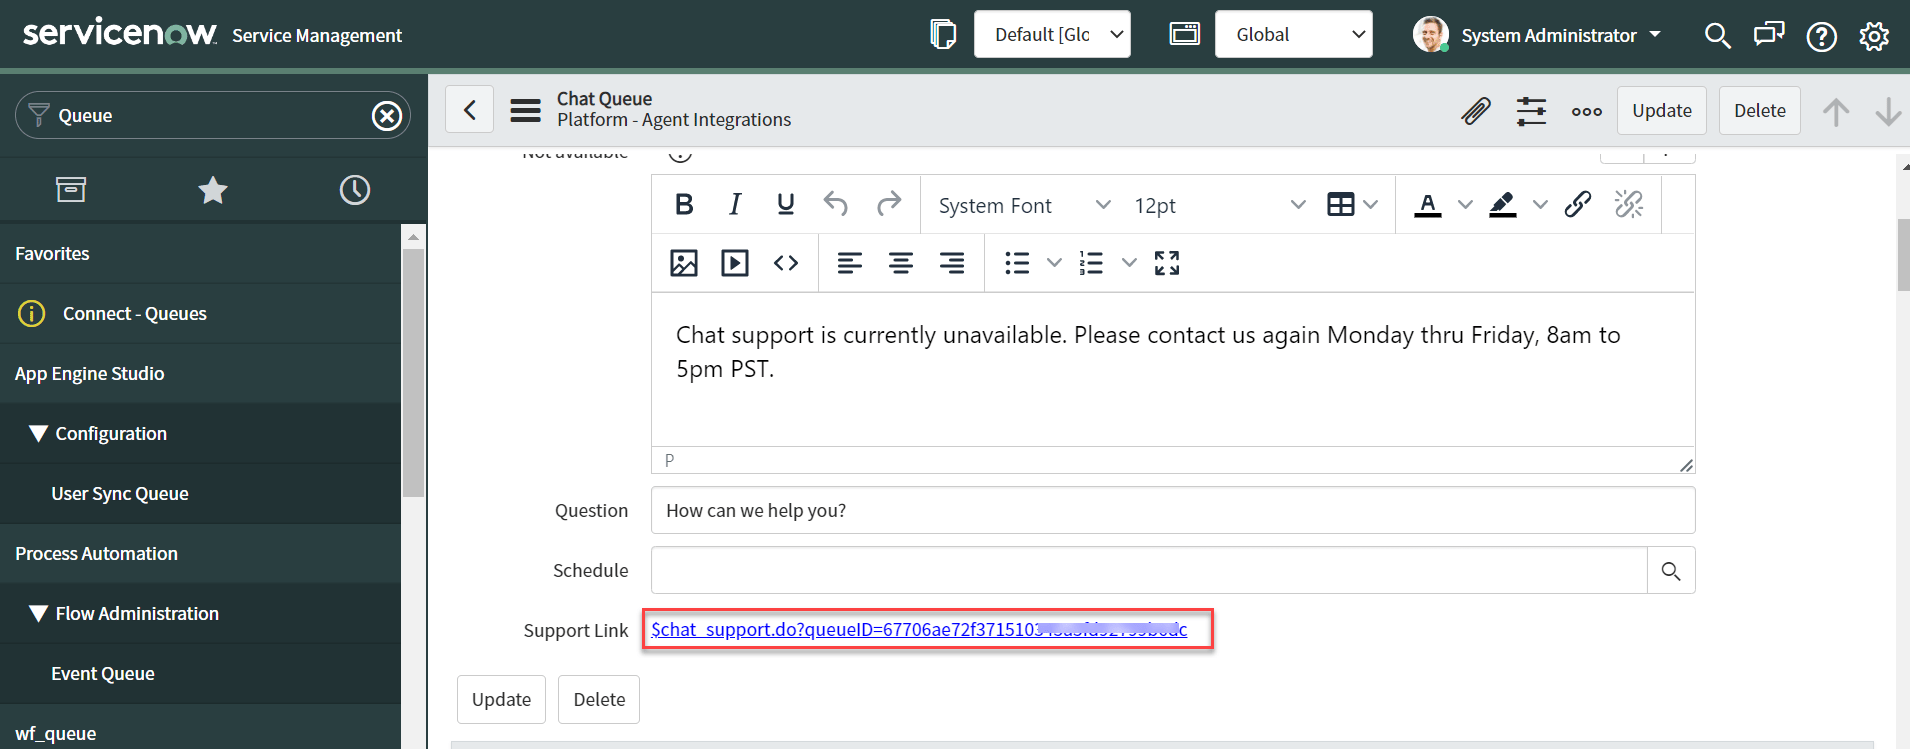
6. Copy the **Queue ID**.
5. Click **Submit** to save the queue entry, then **Submit** again to save the queue.
6. Copy the **Queue ID**.
 ### Step 3: Enable the ServiceNow Agent
1. Log in to the Platform.
2. Select the AI Agent to configure.
3. Navigate to **App Settings > Integrations > Agent Transfer** and click **ServiceNow**.
4. On the **Configurations** tab, choose an authentication method:
**Option 1: Basic Auth**
### Step 3: Enable the ServiceNow Agent
1. Log in to the Platform.
2. Select the AI Agent to configure.
3. Navigate to **App Settings > Integrations > Agent Transfer** and click **ServiceNow**.
4. On the **Configurations** tab, choose an authentication method:
**Option 1: Basic Auth**
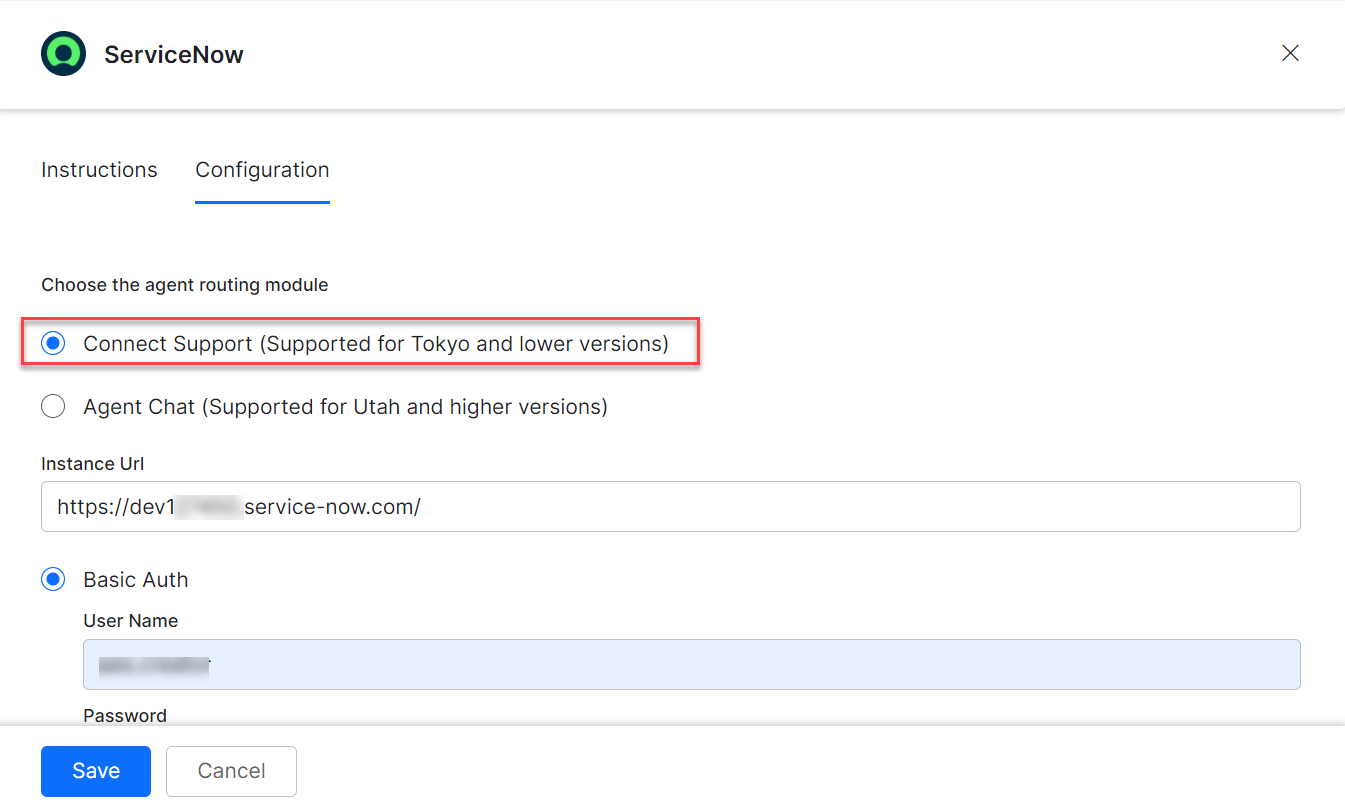 1. Select **Connect Support (Supported for Tokyo and lower versions)**.
2. Select **Basic Auth**.
3. Enter:
| Field | Description |
| ------------ | ------------------------------------------------------------------------- |
| Instance URL | ServiceNow instance URL (for example, `https://devXXX67.service-now.com`) |
| User Name | ServiceNow account username |
| Password | ServiceNow account password |
| Queue ID | Queue ID from Step 2 |
| Webhook URL | Web URL for custom application function callbacks |
**Option 2: OAuth with Refresh Token**
Follow [this ServiceNow documentation](https://support.servicenow.com/kb?id=kb_article_view\&sysparm_article=KB0778194) to generate a refresh token.
1. Select **Connect Support (Supported for Tokyo and lower versions)**.
2. Select **Basic Auth**.
3. Enter:
| Field | Description |
| ------------ | ------------------------------------------------------------------------- |
| Instance URL | ServiceNow instance URL (for example, `https://devXXX67.service-now.com`) |
| User Name | ServiceNow account username |
| Password | ServiceNow account password |
| Queue ID | Queue ID from Step 2 |
| Webhook URL | Web URL for custom application function callbacks |
**Option 2: OAuth with Refresh Token**
Follow [this ServiceNow documentation](https://support.servicenow.com/kb?id=kb_article_view\&sysparm_article=KB0778194) to generate a refresh token.
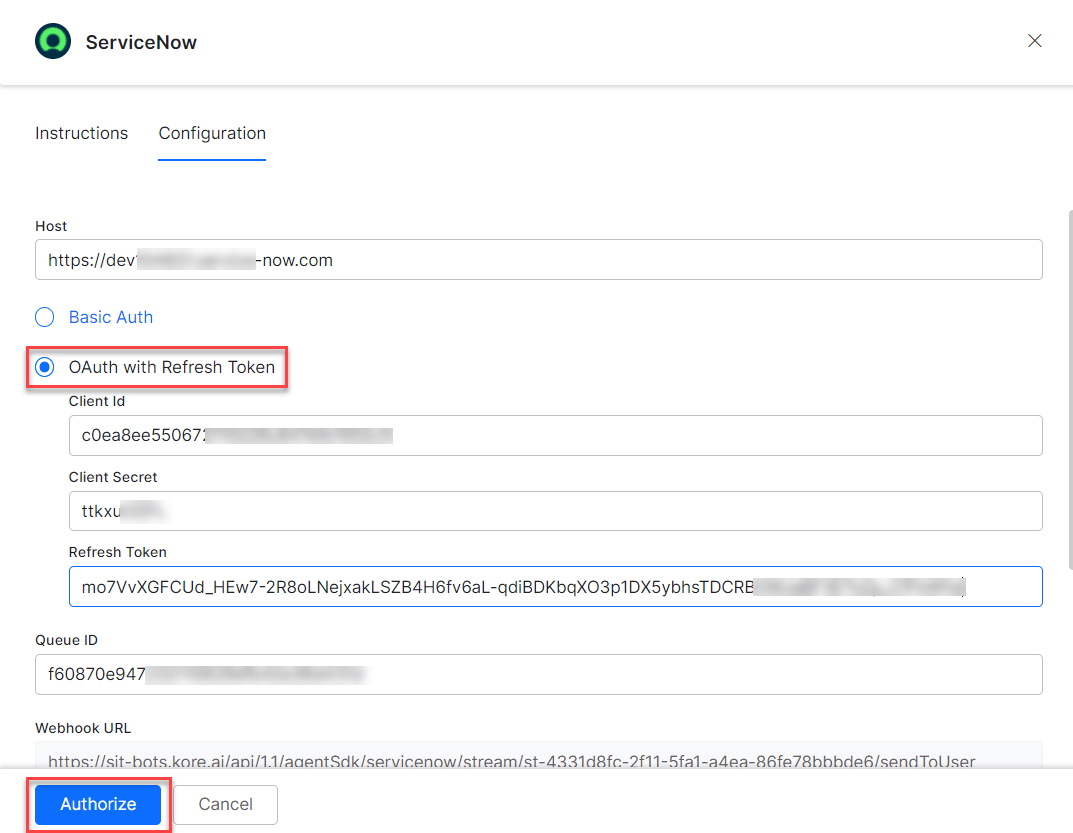 1. Select **Connect Support (Supported for Tokyo and lower versions)**.
2. Select **OAuth with Refresh Token**.
3. Enter:
| Field | Description |
| ------------- | ------------------------------------------------- |
| Instance URL | ServiceNow instance URL |
| Client ID | Client ID from your ServiceNow application |
| Client Secret | Client secret from your ServiceNow application |
| Refresh Token | Refresh token generated per the documentation |
| Webhook URL | Web URL for custom application function callbacks |
5. Click **Authorize** to authenticate.
6. To make ServiceNow the default agent, enable **Default Agent System for all app channels**.
This option is enabled only when multiple agents are configured.
7. Click **Configure** to map channels.
1. Select **Connect Support (Supported for Tokyo and lower versions)**.
2. Select **OAuth with Refresh Token**.
3. Enter:
| Field | Description |
| ------------- | ------------------------------------------------- |
| Instance URL | ServiceNow instance URL |
| Client ID | Client ID from your ServiceNow application |
| Client Secret | Client secret from your ServiceNow application |
| Refresh Token | Refresh token generated per the documentation |
| Webhook URL | Web URL for custom application function callbacks |
5. Click **Authorize** to authenticate.
6. To make ServiceNow the default agent, enable **Default Agent System for all app channels**.
This option is enabled only when multiple agents are configured.
7. Click **Configure** to map channels.
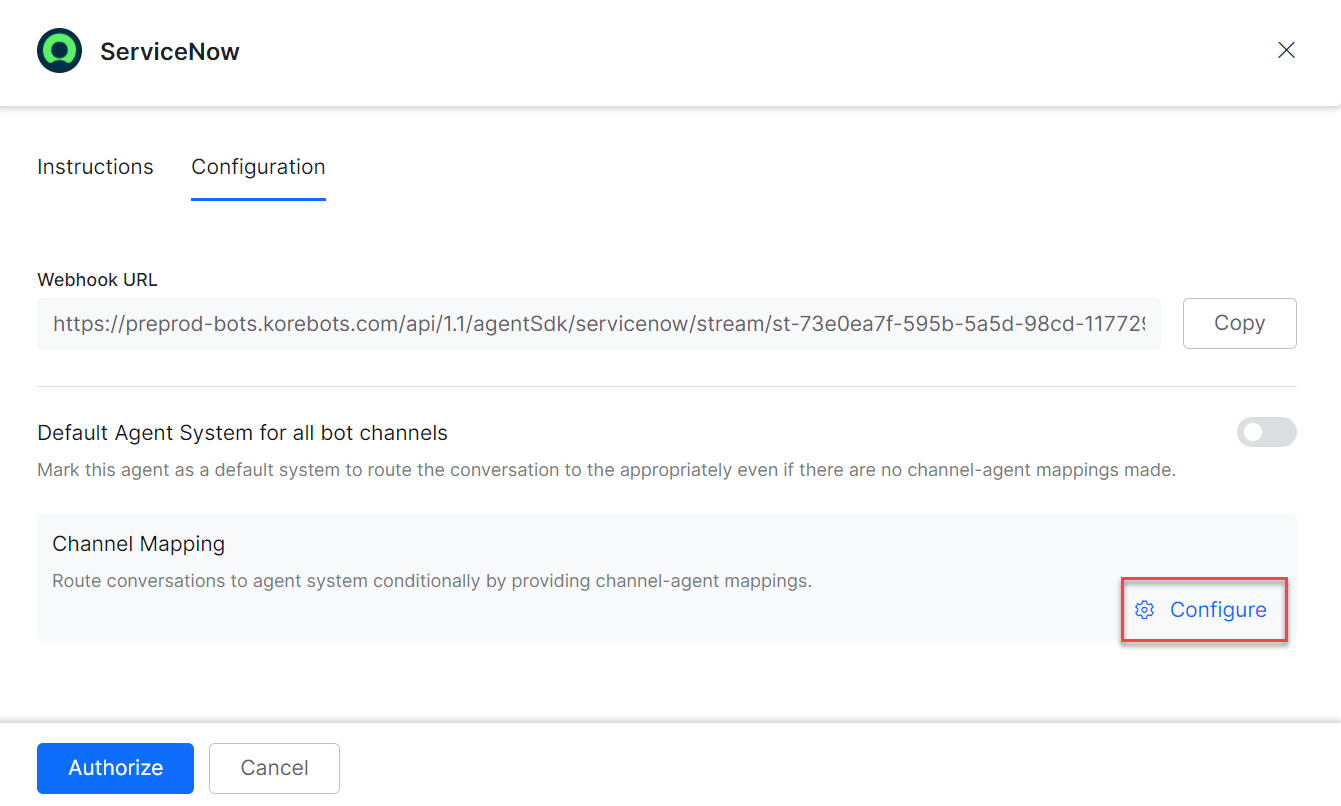 8. Select channels to map to the ServiceNow agent.
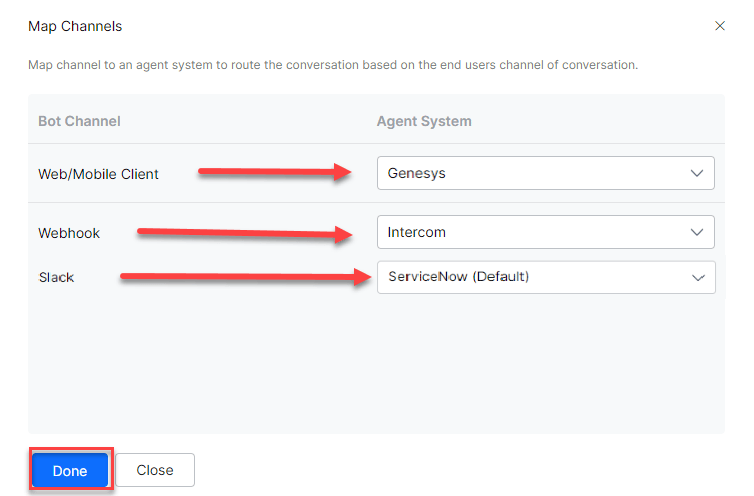 9. Click **Done**, then **Save**.
10. Publish the app. See [Publishing your App](/ai-for-service/deployment/publishing-app).
### Step 4: Switch to UI16 Theme
1. Log in to ServiceNow with admin credentials.
2. Navigate to **System Properties** and click **New**.
9. Click **Done**, then **Save**.
10. Publish the app. See [Publishing your App](/ai-for-service/deployment/publishing-app).
### Step 4: Switch to UI16 Theme
1. Log in to ServiceNow with admin credentials.
2. Navigate to **System Properties** and click **New**.
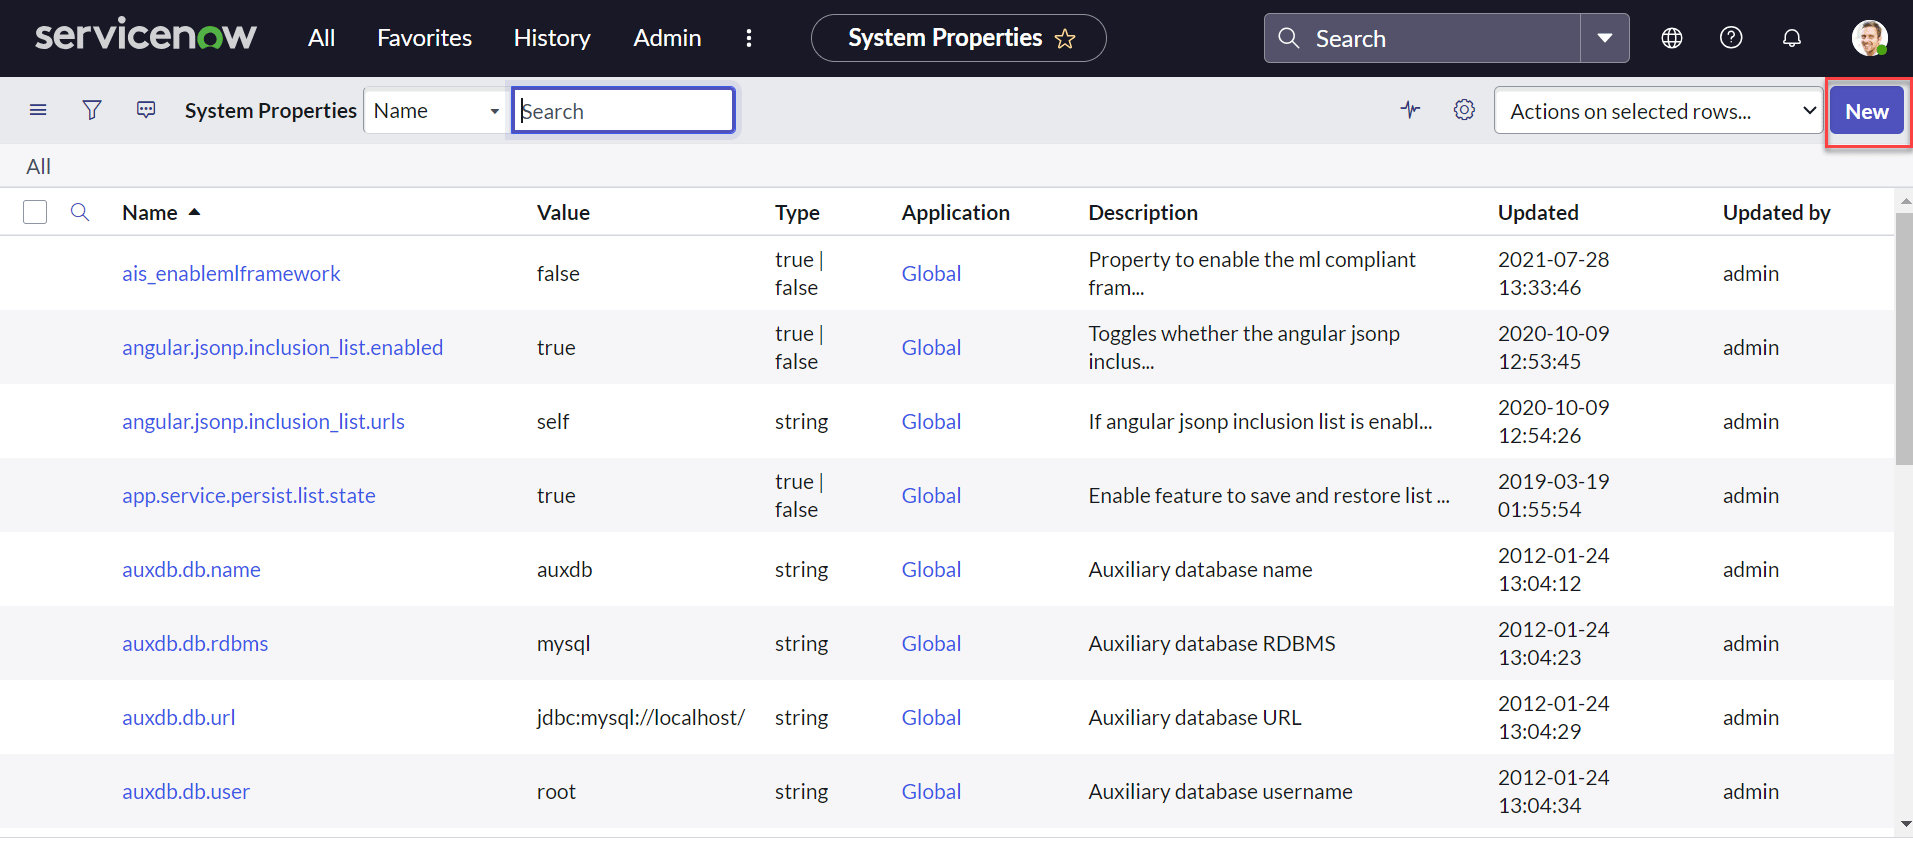 3. Enter the property `glide.ui.polaris.on_off_user_pref_enabled`, set type to `true|false`, and click **Submit**.
 This property allows toggling between "Next experience and UI16" and classic experience.
4. Click the **System Admin** profile and select **Preferences**.
This property allows toggling between "Next experience and UI16" and classic experience.
4. Click the **System Admin** profile and select **Preferences**.
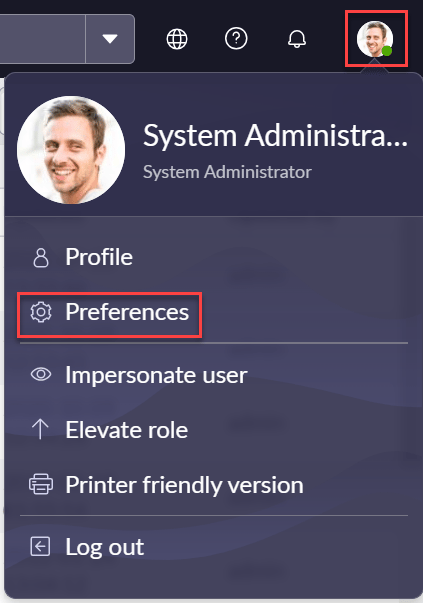 5. Enable **Turn off Next experience**.
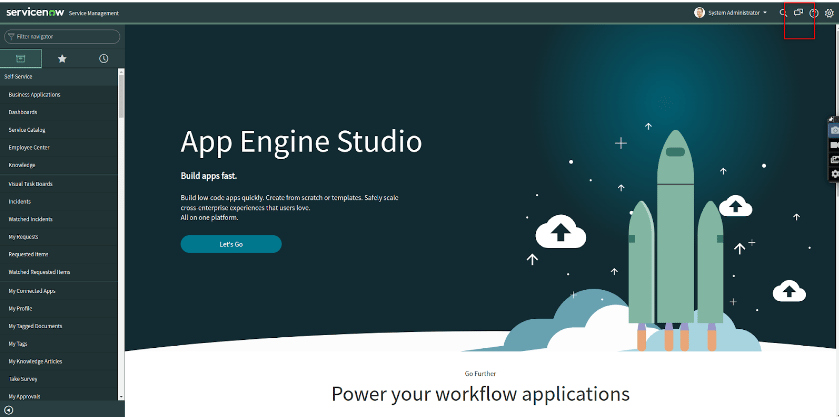
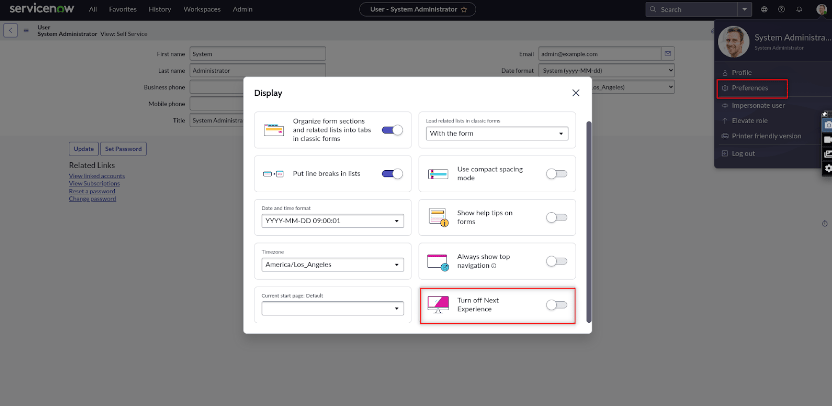 6. The view switches to UI16 theme.
 ### Step 5: Install the Required Plugins
1. Log in to the ServiceNow Developer instance with admin credentials.
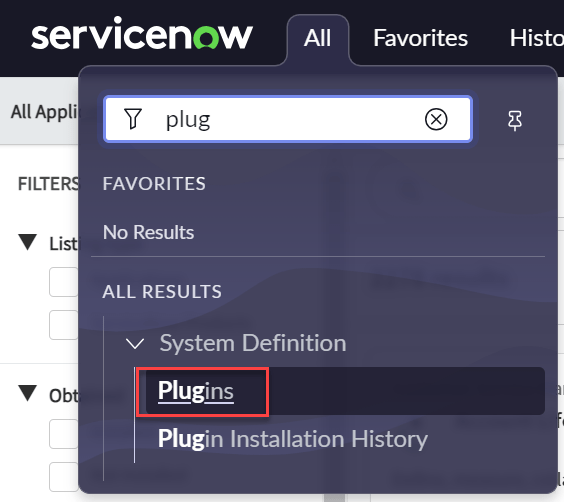
2. Navigate to **System Definition > Plugins** from the left menu.
### Step 5: Install the Required Plugins
1. Log in to the ServiceNow Developer instance with admin credentials.
2. Navigate to **System Definition > Plugins** from the left menu.
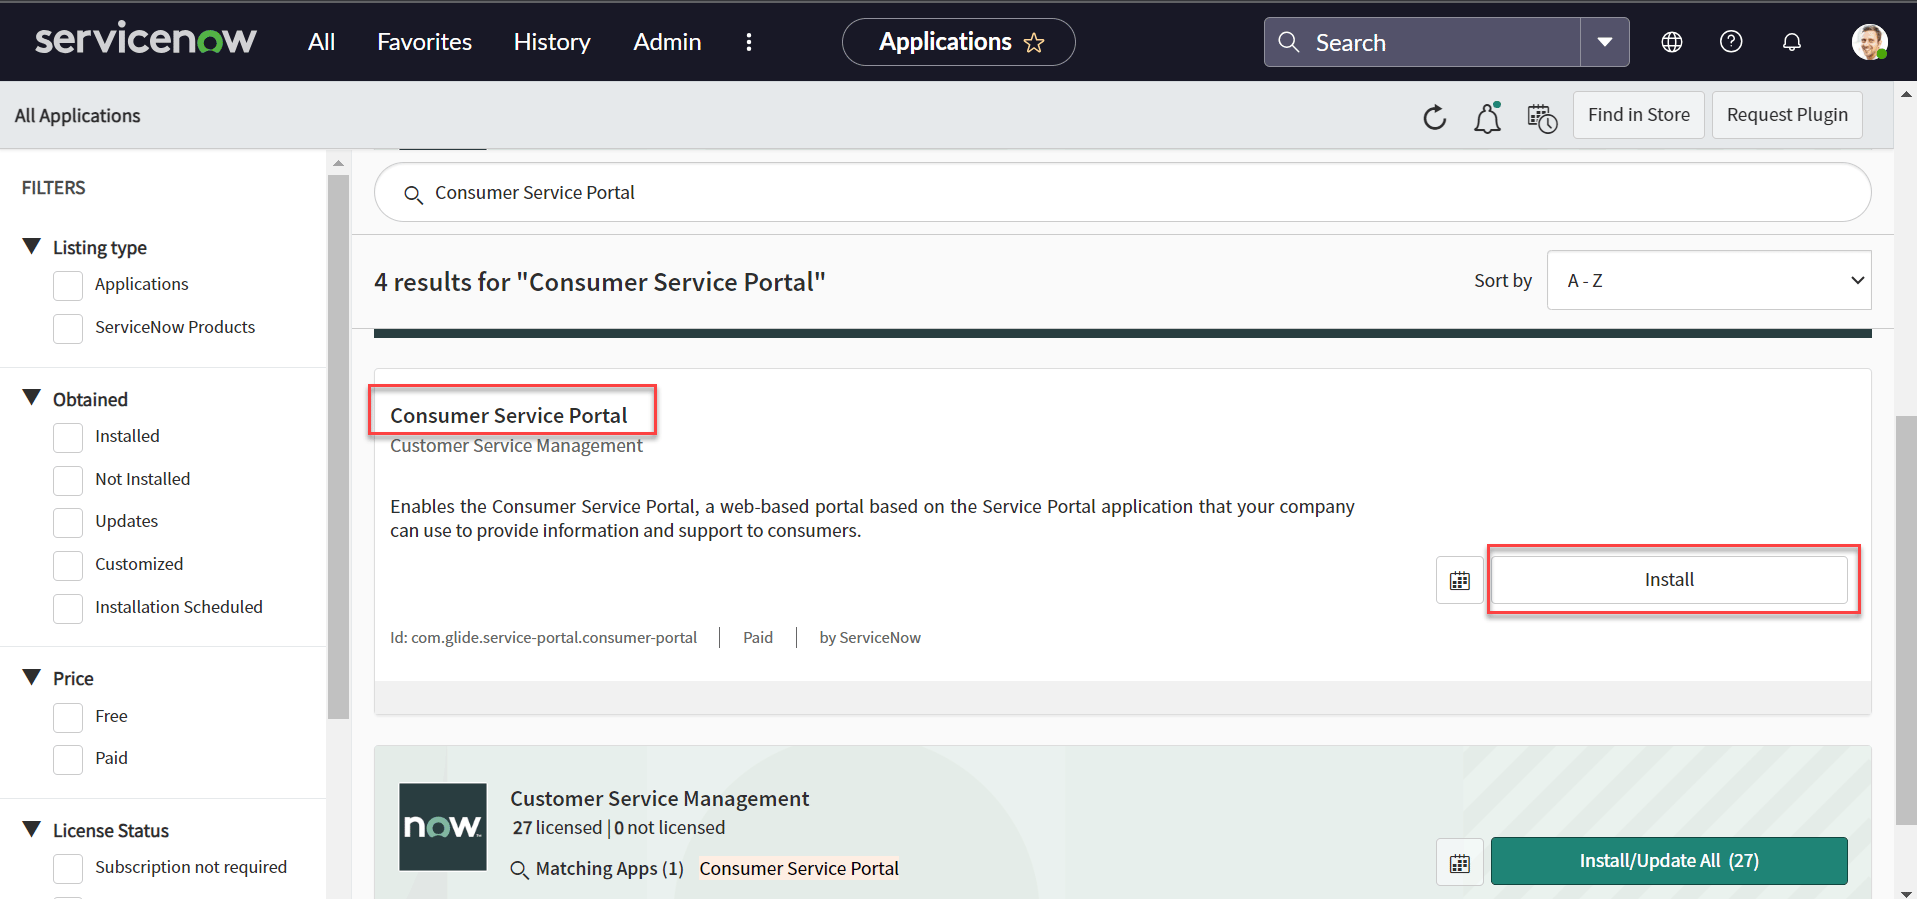
 3. Search for and install the **Consumer Service Portal** plugin.
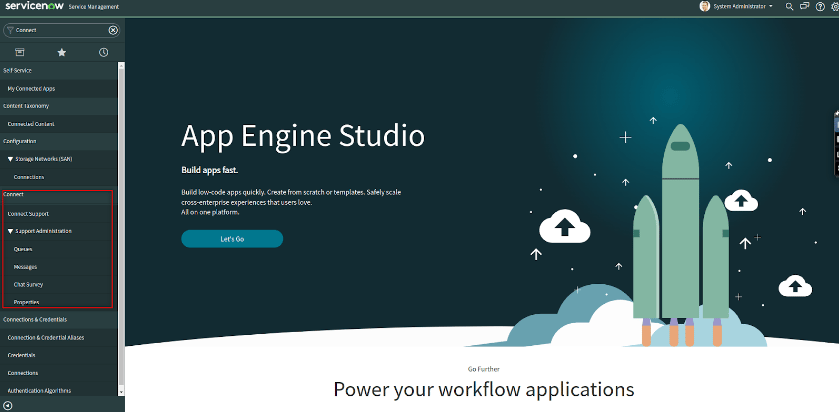
 4. After installation, the **Connect support** menu item appears in the left navigation.
 ### Step 6: Create a User with agent\_admin Role
1. Log in to the ServiceNow instance with admin credentials.
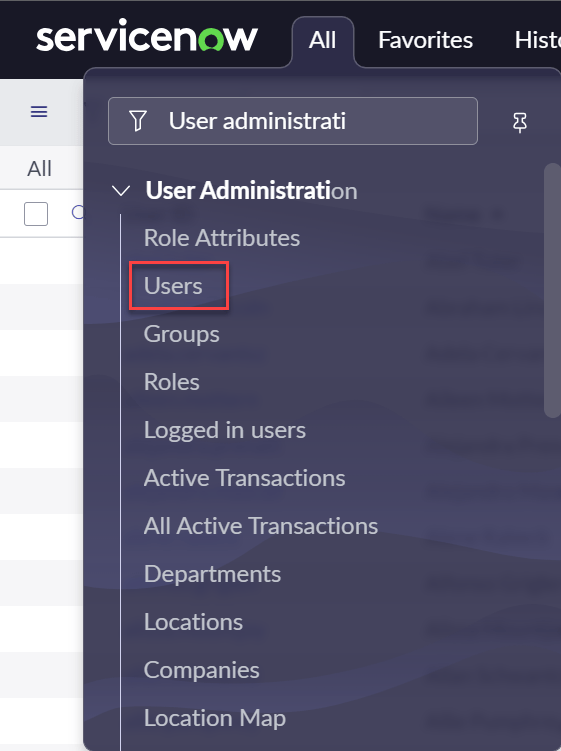
2. Navigate to **User Administration > Users > New**.
### Step 6: Create a User with agent\_admin Role
1. Log in to the ServiceNow instance with admin credentials.
2. Navigate to **User Administration > Users > New**.
 3. Fill in the user details and click **Submit**.
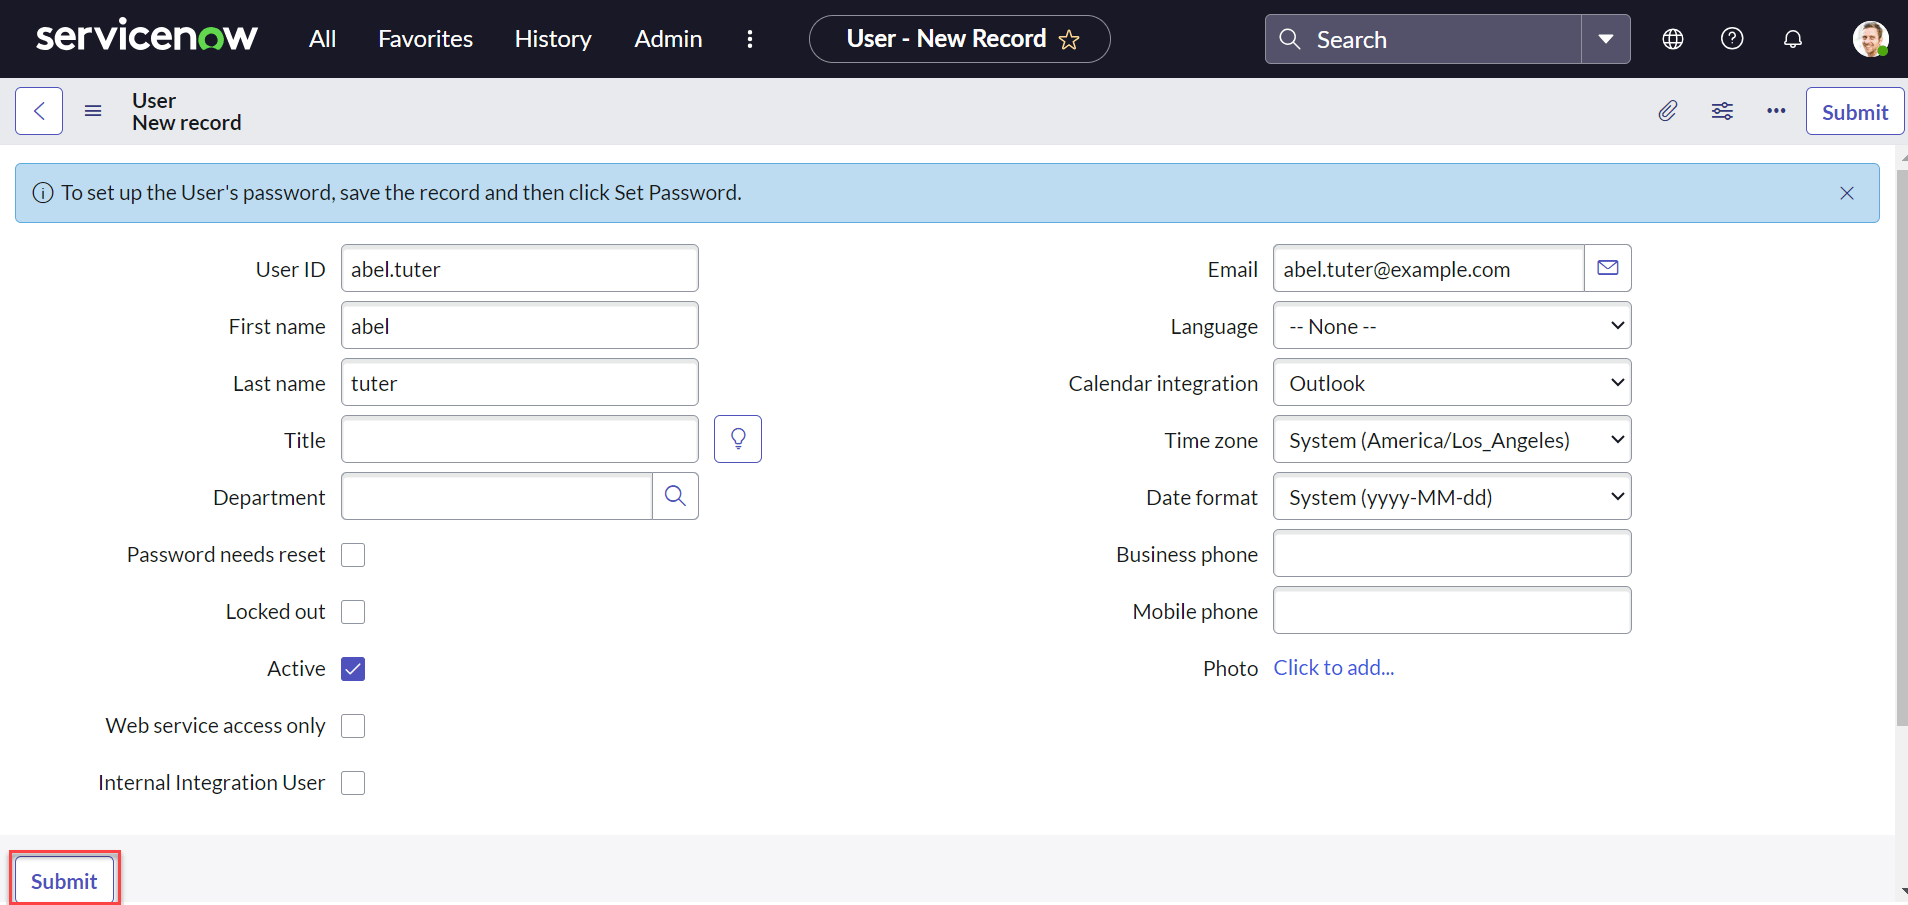 4. Select the **Roles** tab and click **Edit**.
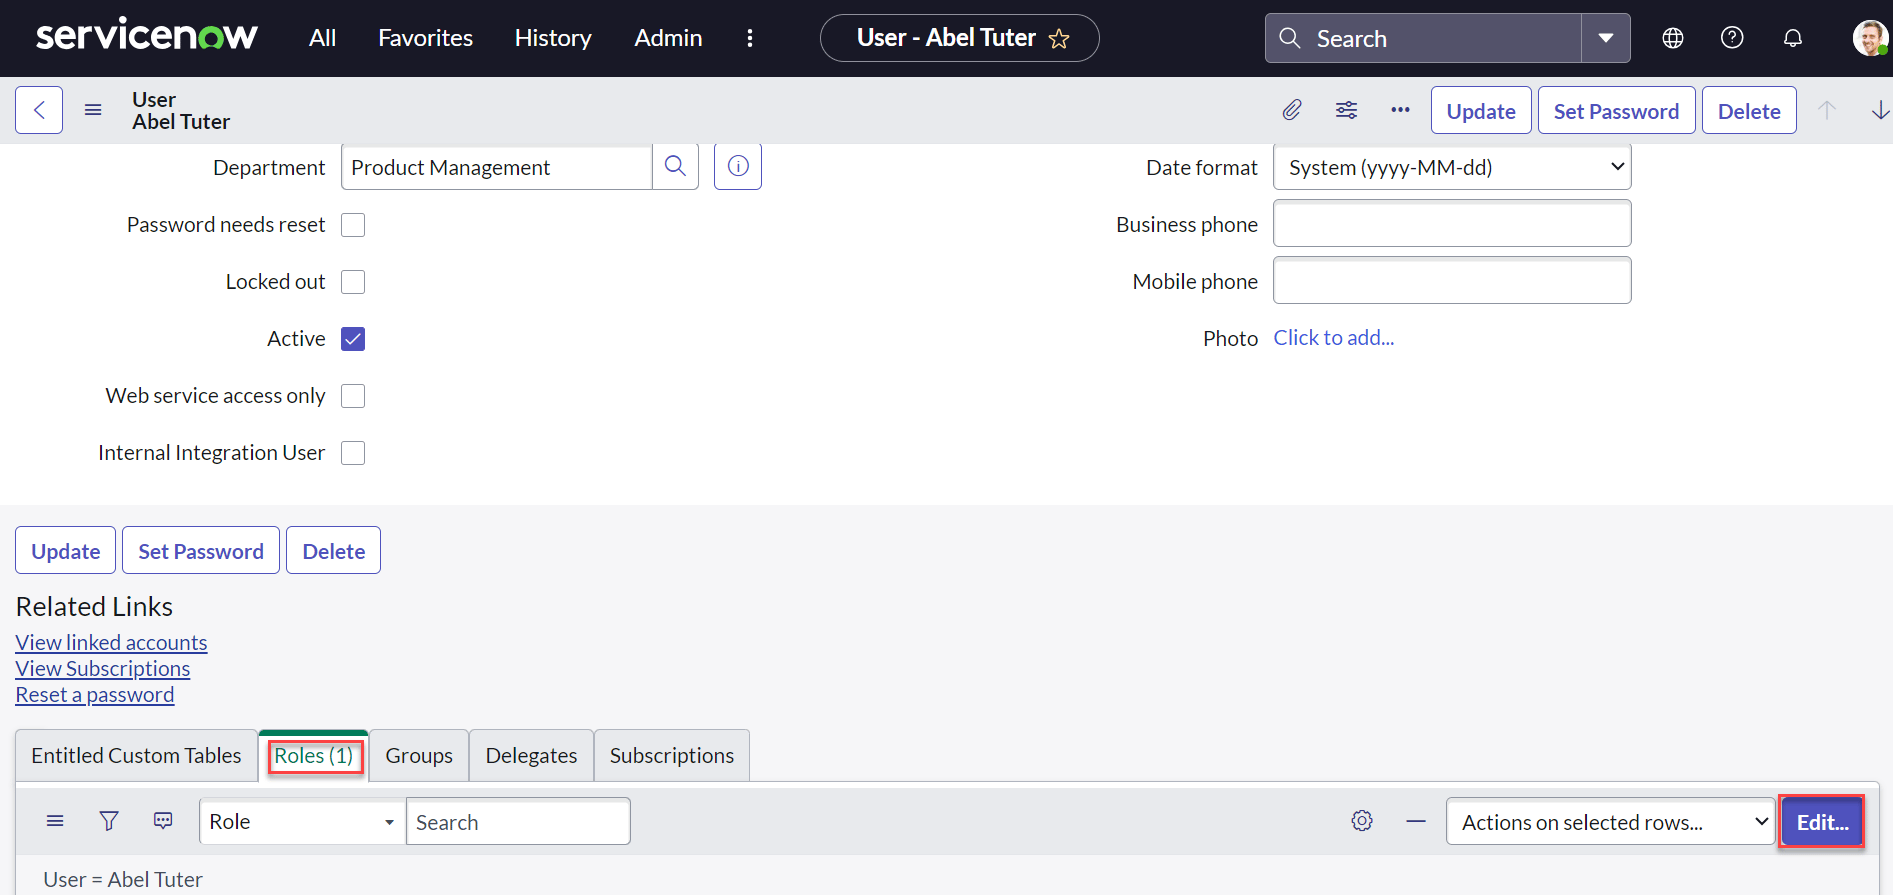 5. Search for and add the **agent\_admin** role to the user.
 6. Click **Save**.
### Step 7: Create a Group and Add the User
1. Navigate to **User Administration > Groups**.
6. Click **Save**.
### Step 7: Create a Group and Add the User
1. Navigate to **User Administration > Groups**.
 2. Click **New**.
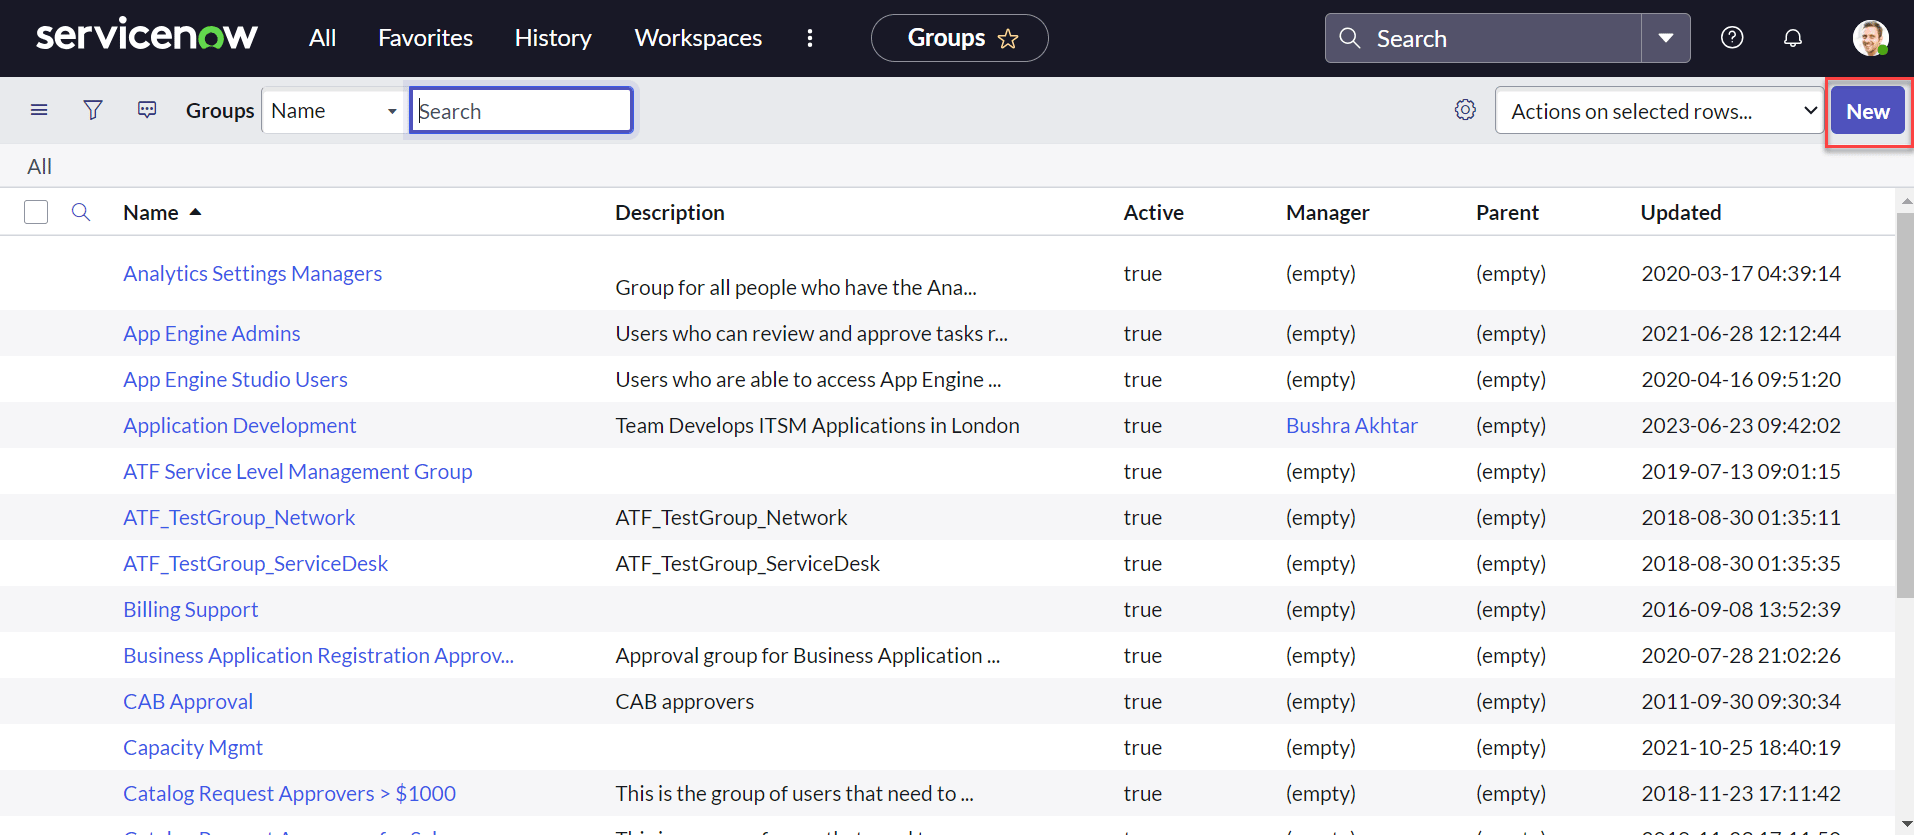 3. Fill in the group details and click **Submit**.
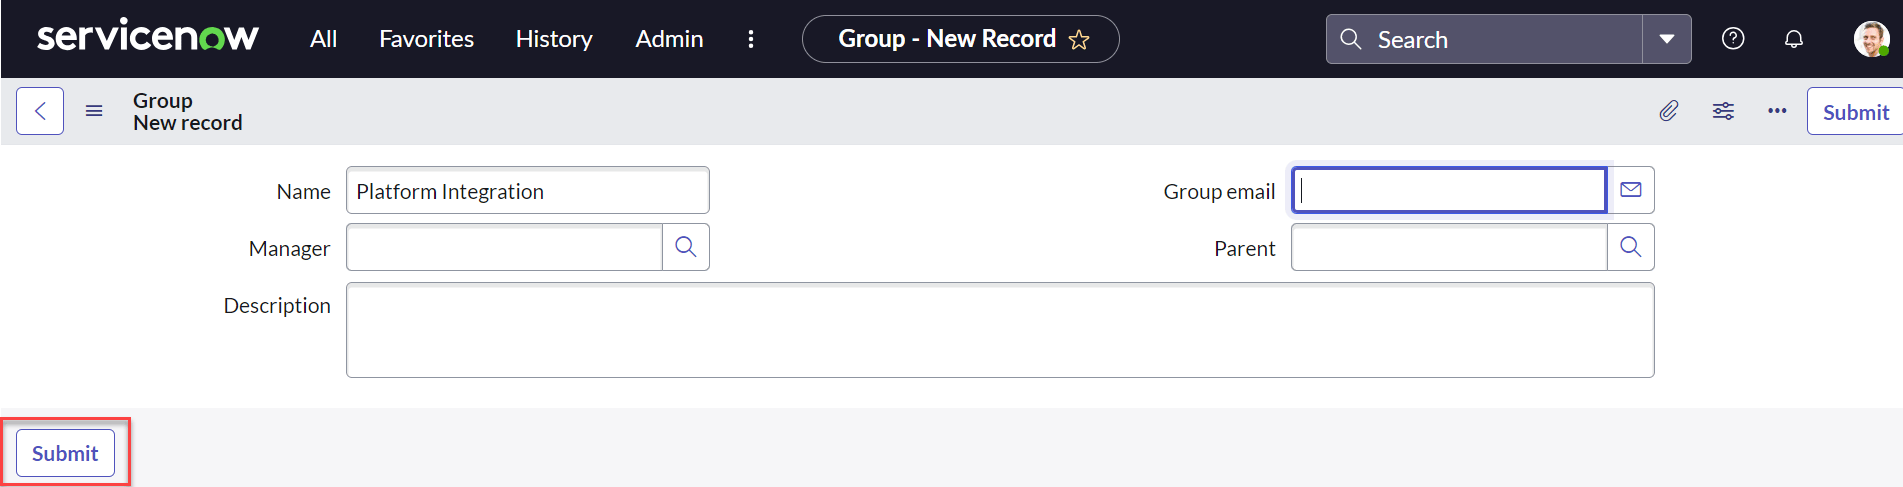 4. Edit the group, scroll to the **Group Members** tab, and click **Edit**.
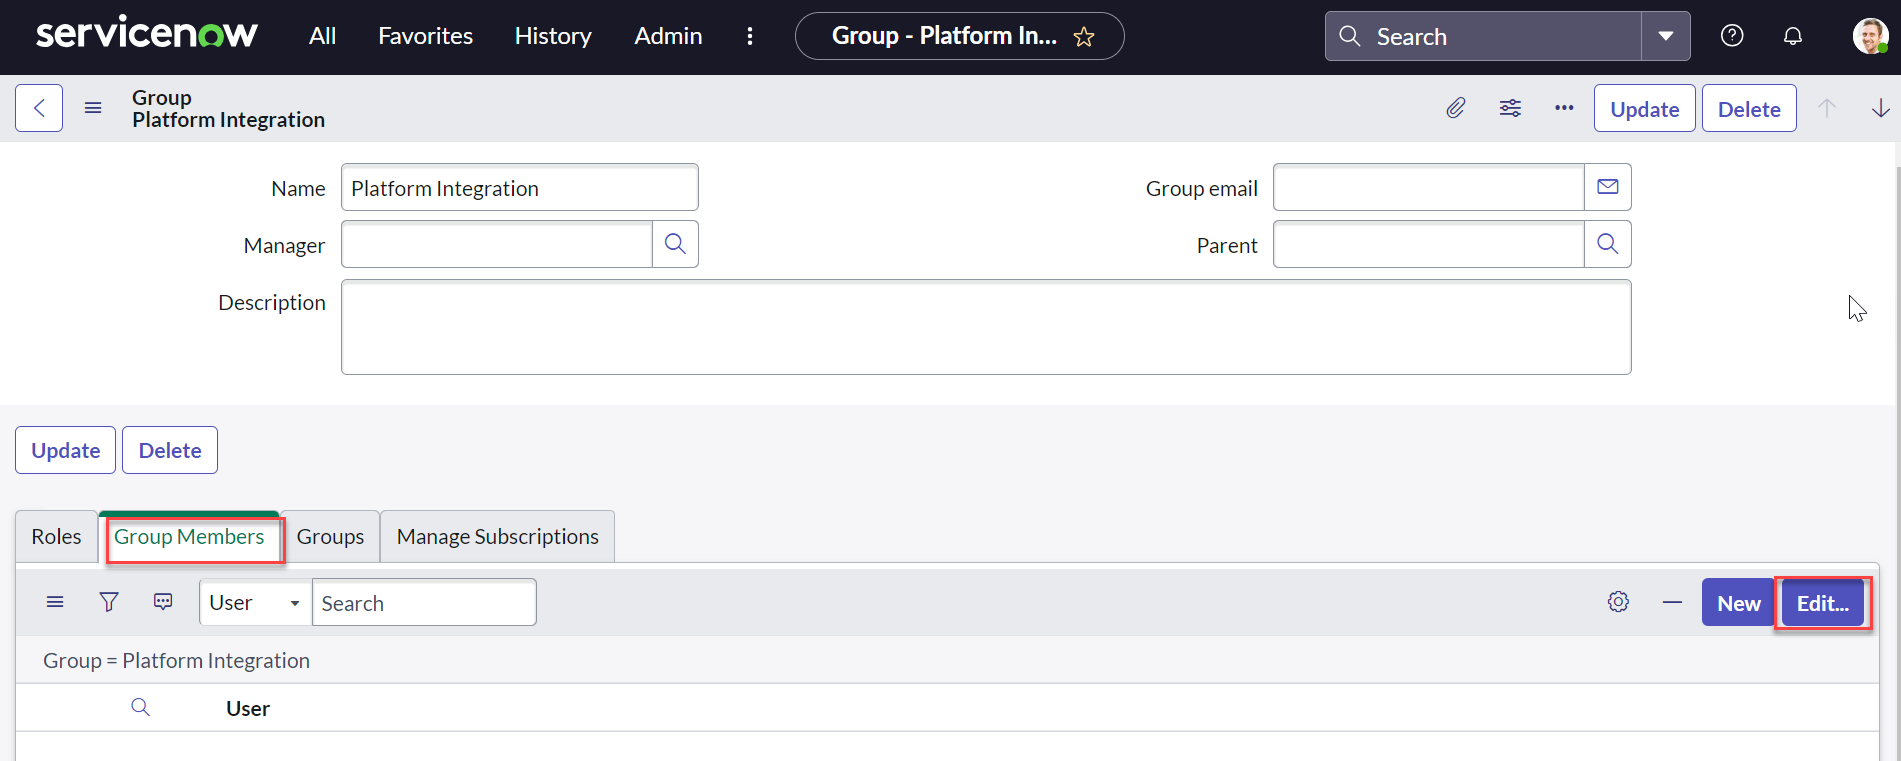 5. Select the agent from Step 6 and add them to the group.
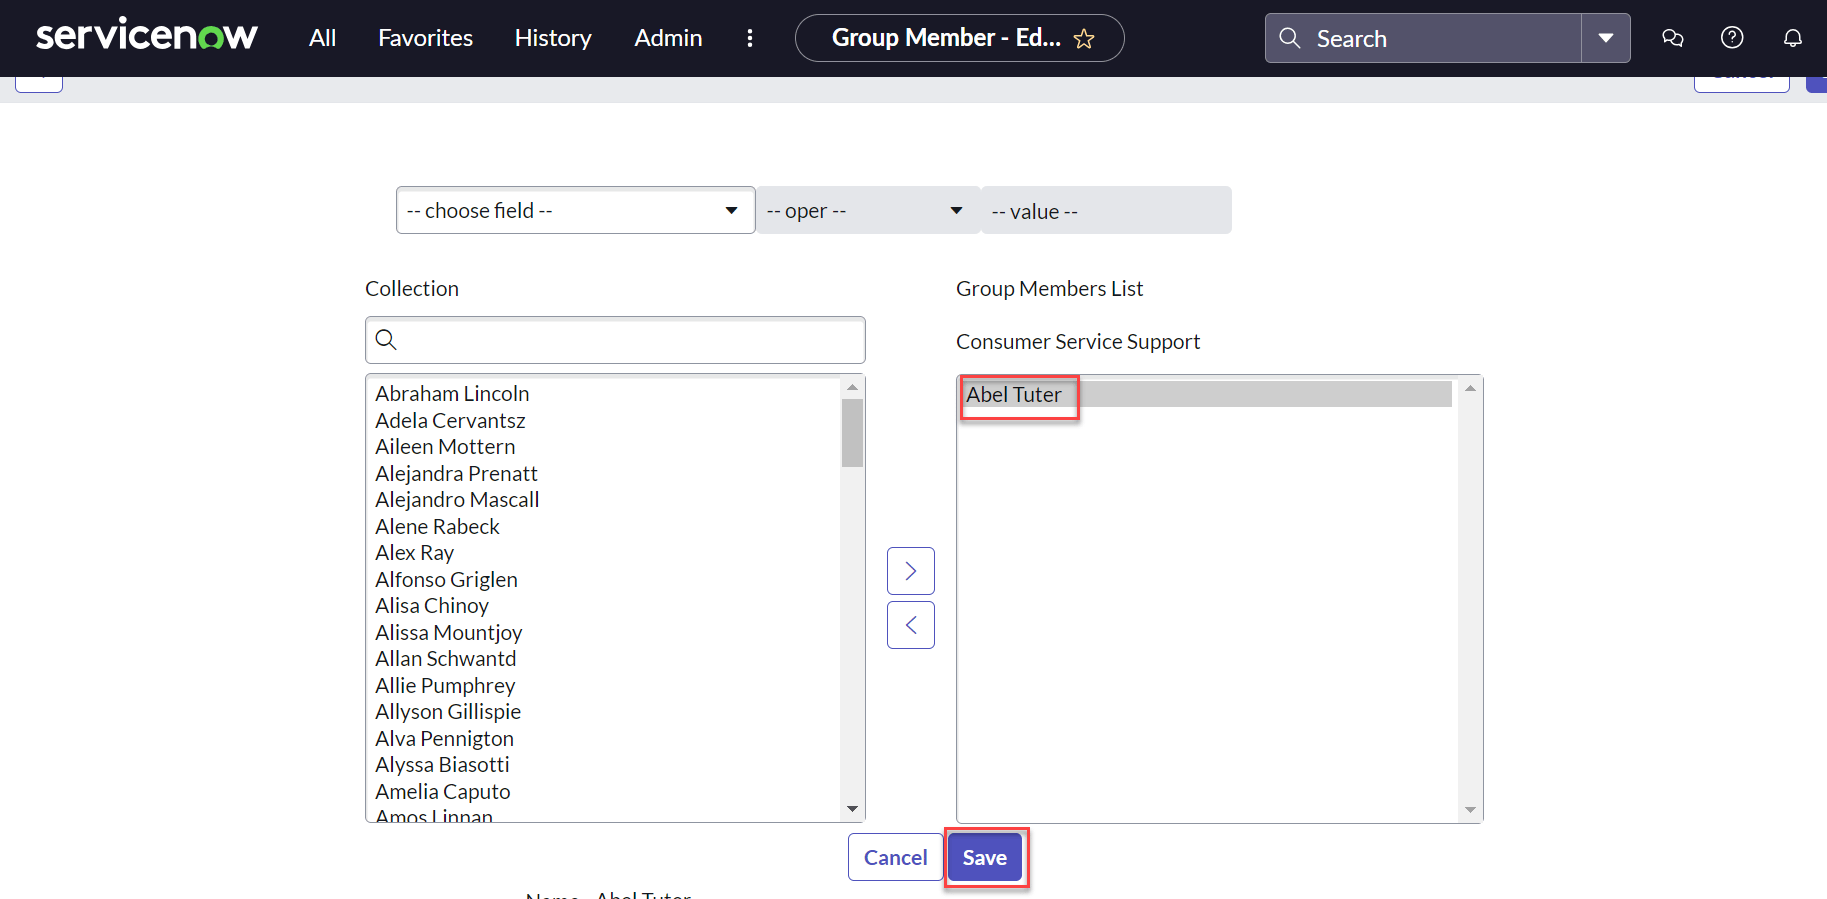 6. Click **Save**.
### Step 8: Define the Host URL in the REST Message
1. Log in to your ServiceNow account.
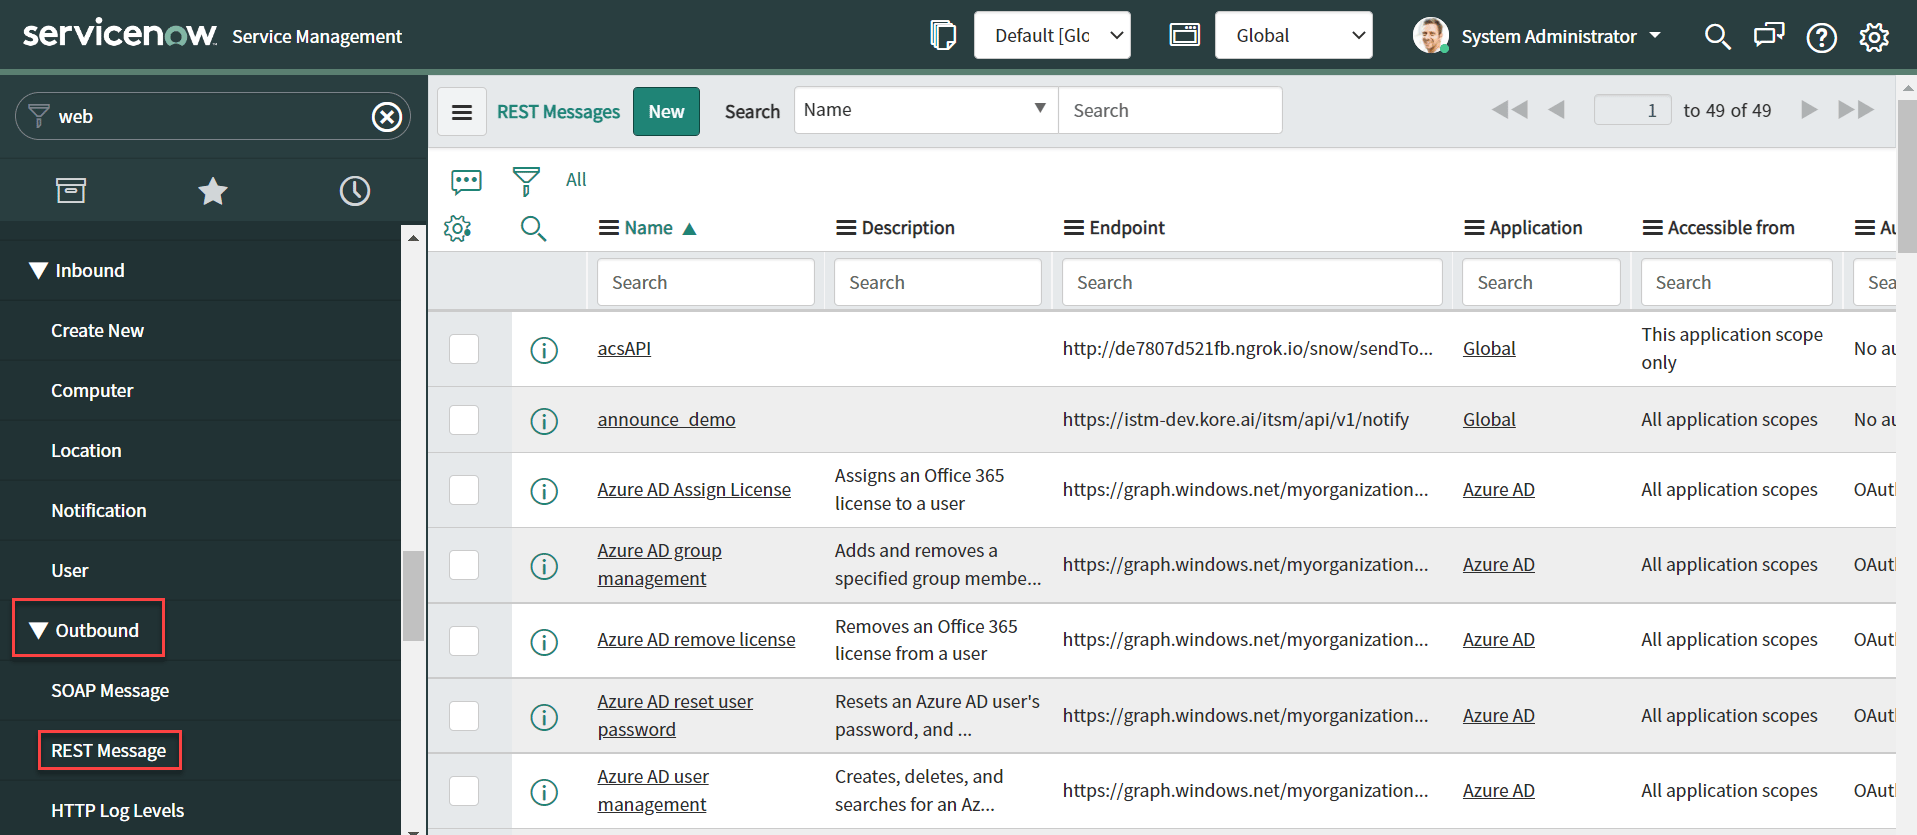
2. Navigate to **System Web Services > Outbound > REST Messages** from the left menu.
3. Click **New** to create a new REST Message.
6. Click **Save**.
### Step 8: Define the Host URL in the REST Message
1. Log in to your ServiceNow account.
2. Navigate to **System Web Services > Outbound > REST Messages** from the left menu.
3. Click **New** to create a new REST Message.
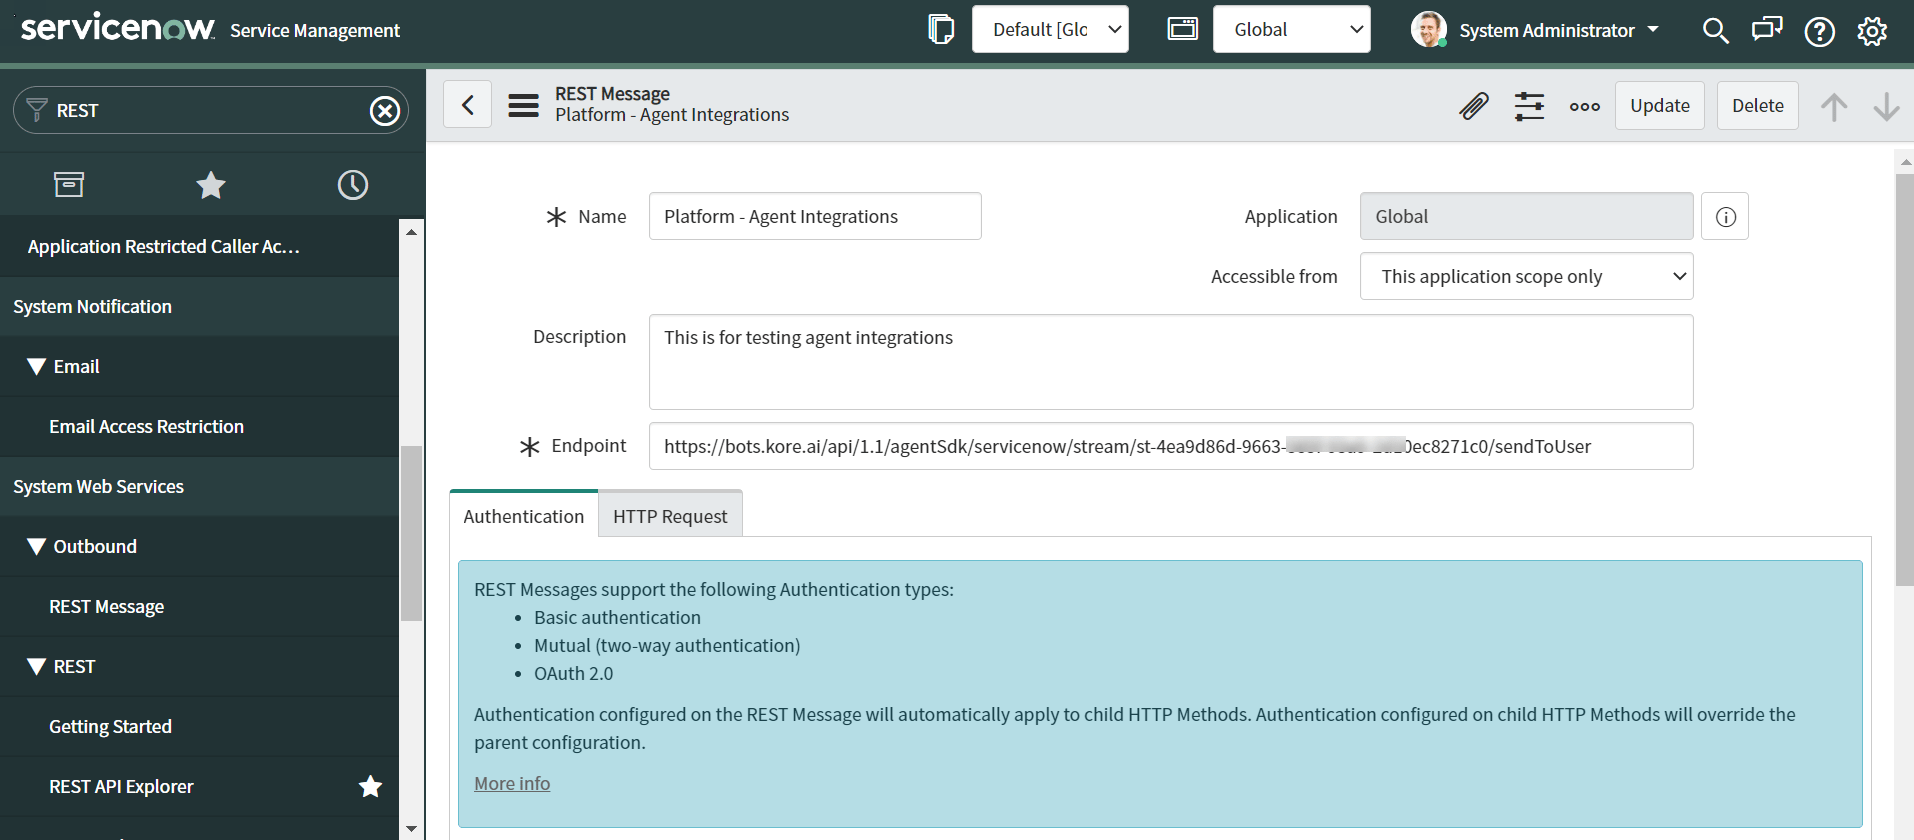
 4. Copy the **Webhook URL** from the Platform AI Agent configuration page and paste it into the **Endpoint URL** field.
 5. Click **Save**.
### Step 9: Define Outbound REST Message Requests
1. Navigate to **System Web Services > Outbound > REST Messages**.
2. Select the REST Message for Platform agent integrations (for example, `Platform - Agent Integrations`).
5. Click **Save**.
### Step 9: Define Outbound REST Message Requests
1. Navigate to **System Web Services > Outbound > REST Messages**.
2. Select the REST Message for Platform agent integrations (for example, `Platform - Agent Integrations`).
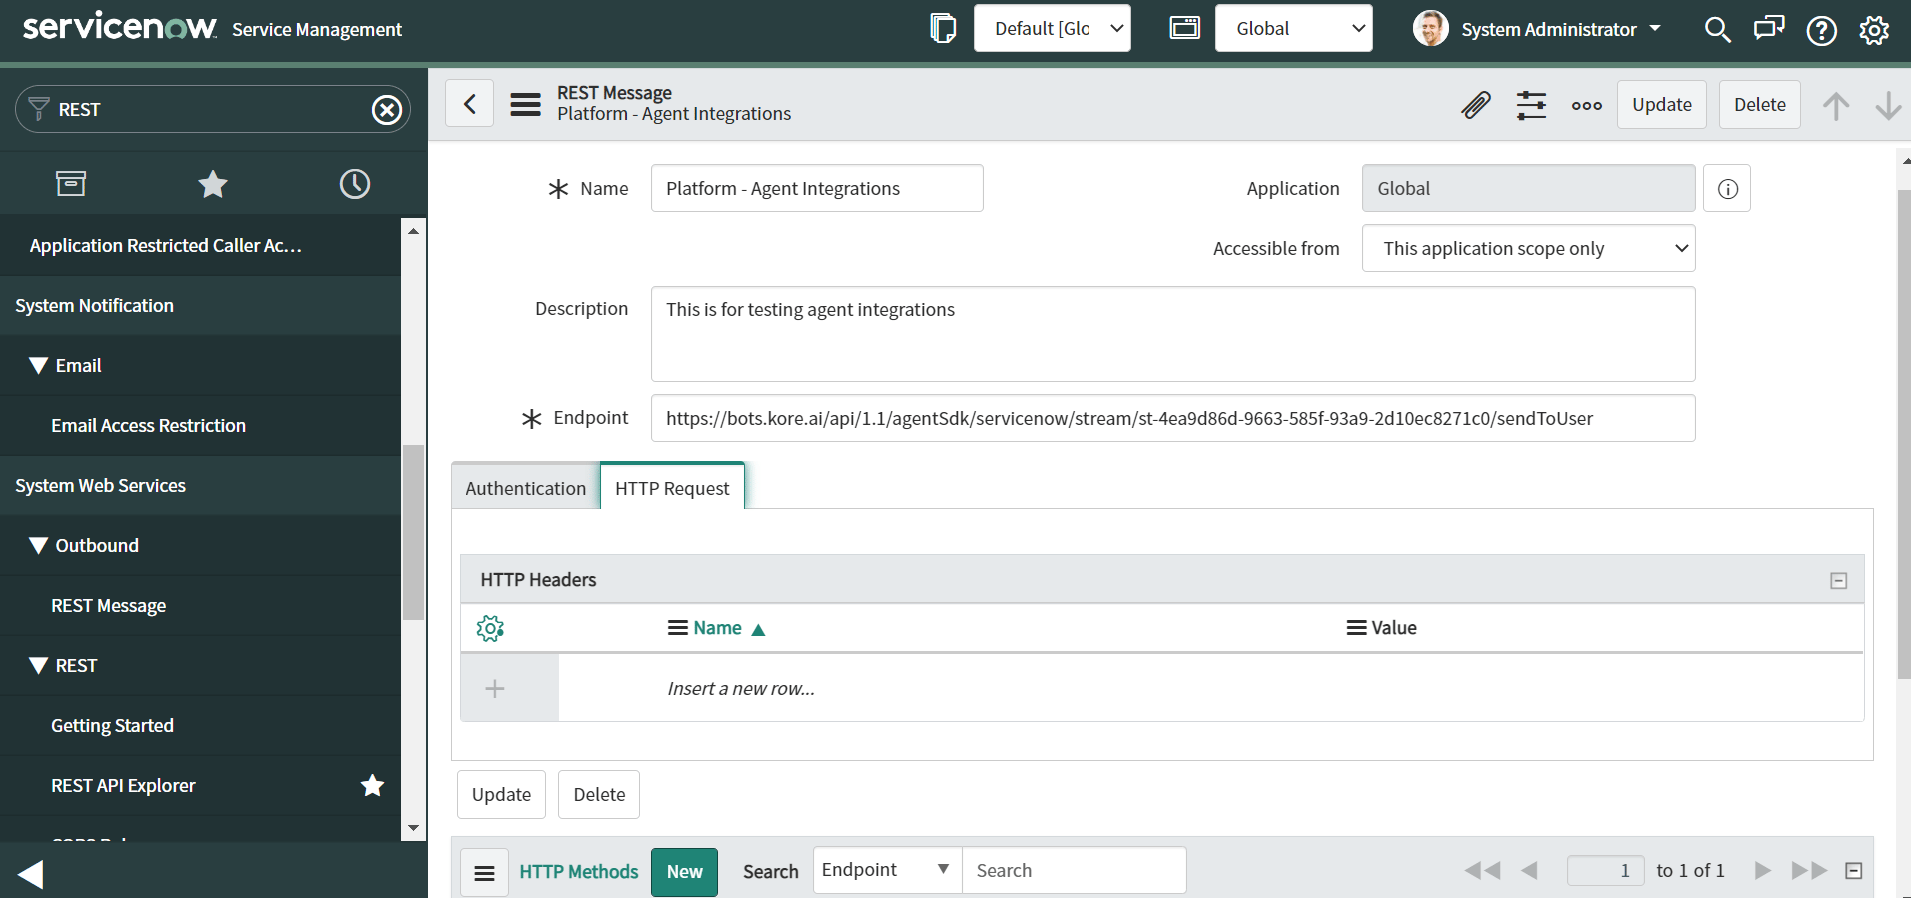 3. Enter the API details including the endpoint URL (Callback URL from the Configurations page) and HTTP method.
This endpoint is how ServiceNow sends agent messages to the user.
4. Click the **HTTP Request** tab and select **Add New Row**.
3. Enter the API details including the endpoint URL (Callback URL from the Configurations page) and HTTP method.
This endpoint is how ServiceNow sends agent messages to the user.
4. Click the **HTTP Request** tab and select **Add New Row**.
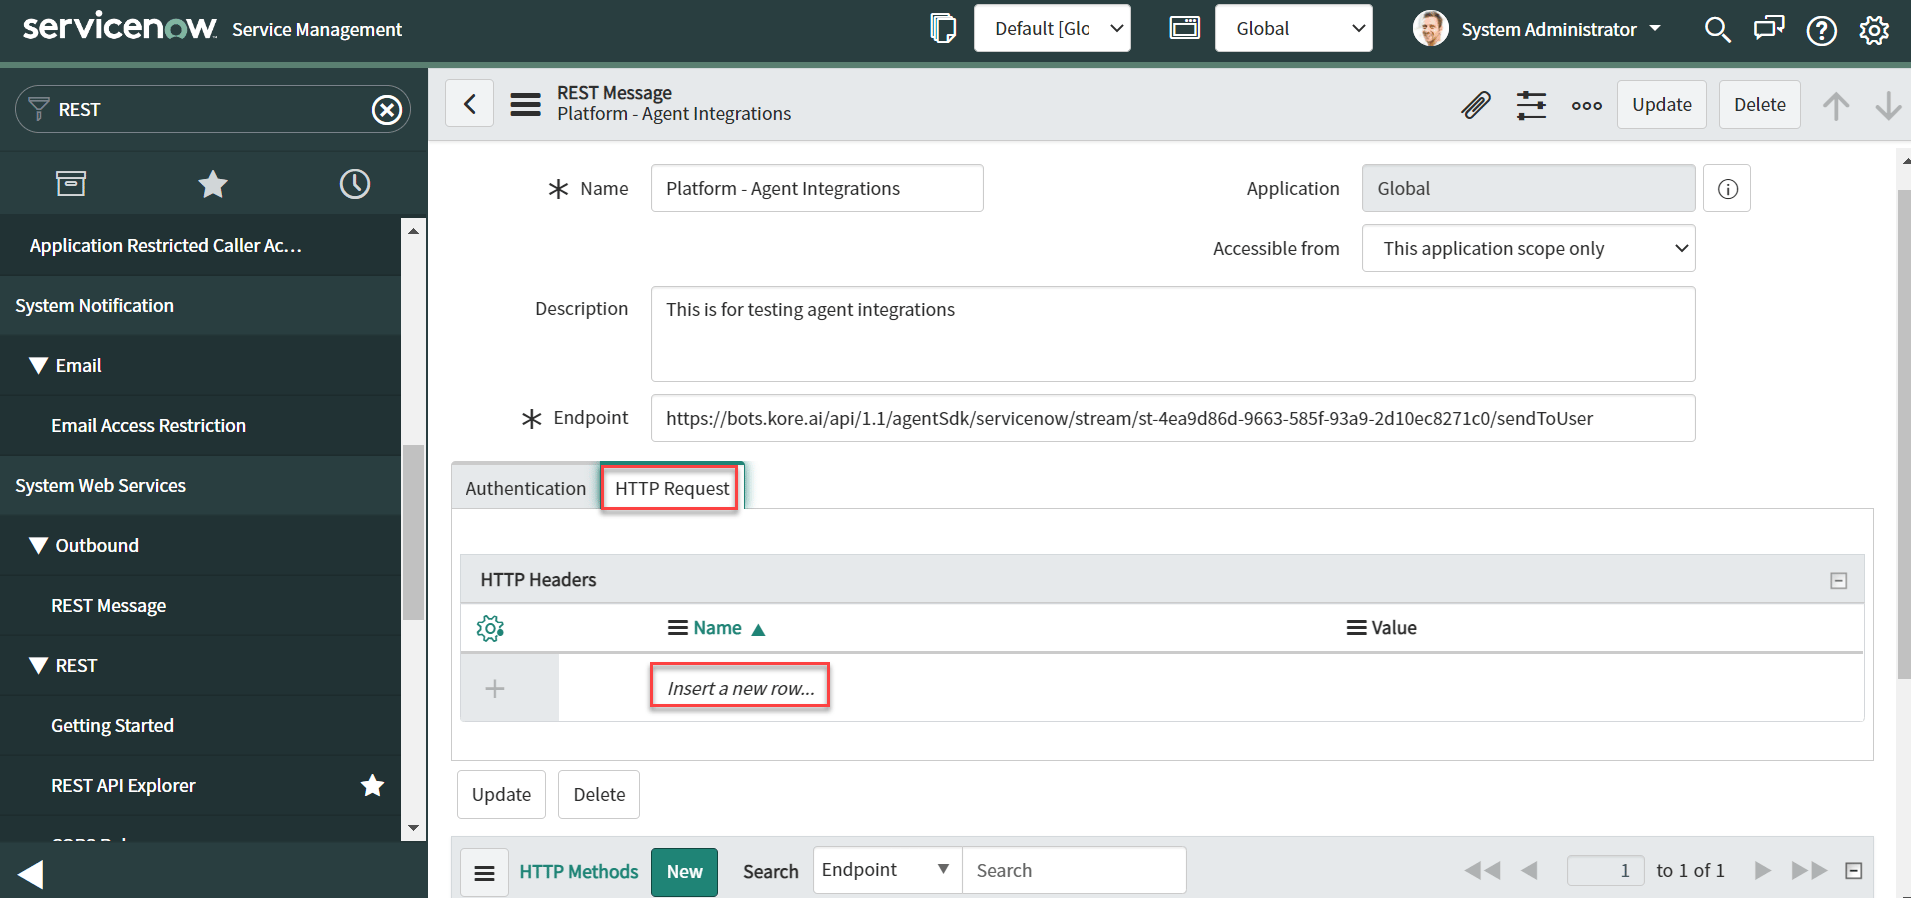 5. Add:
* **HTTP Header**: `Content-Type: application/json`
* **Method**: `POST` — paste the Webhook URL in the Endpoint field.
5. Add:
* **HTTP Header**: `Content-Type: application/json`
* **Method**: `POST` — paste the Webhook URL in the Endpoint field.
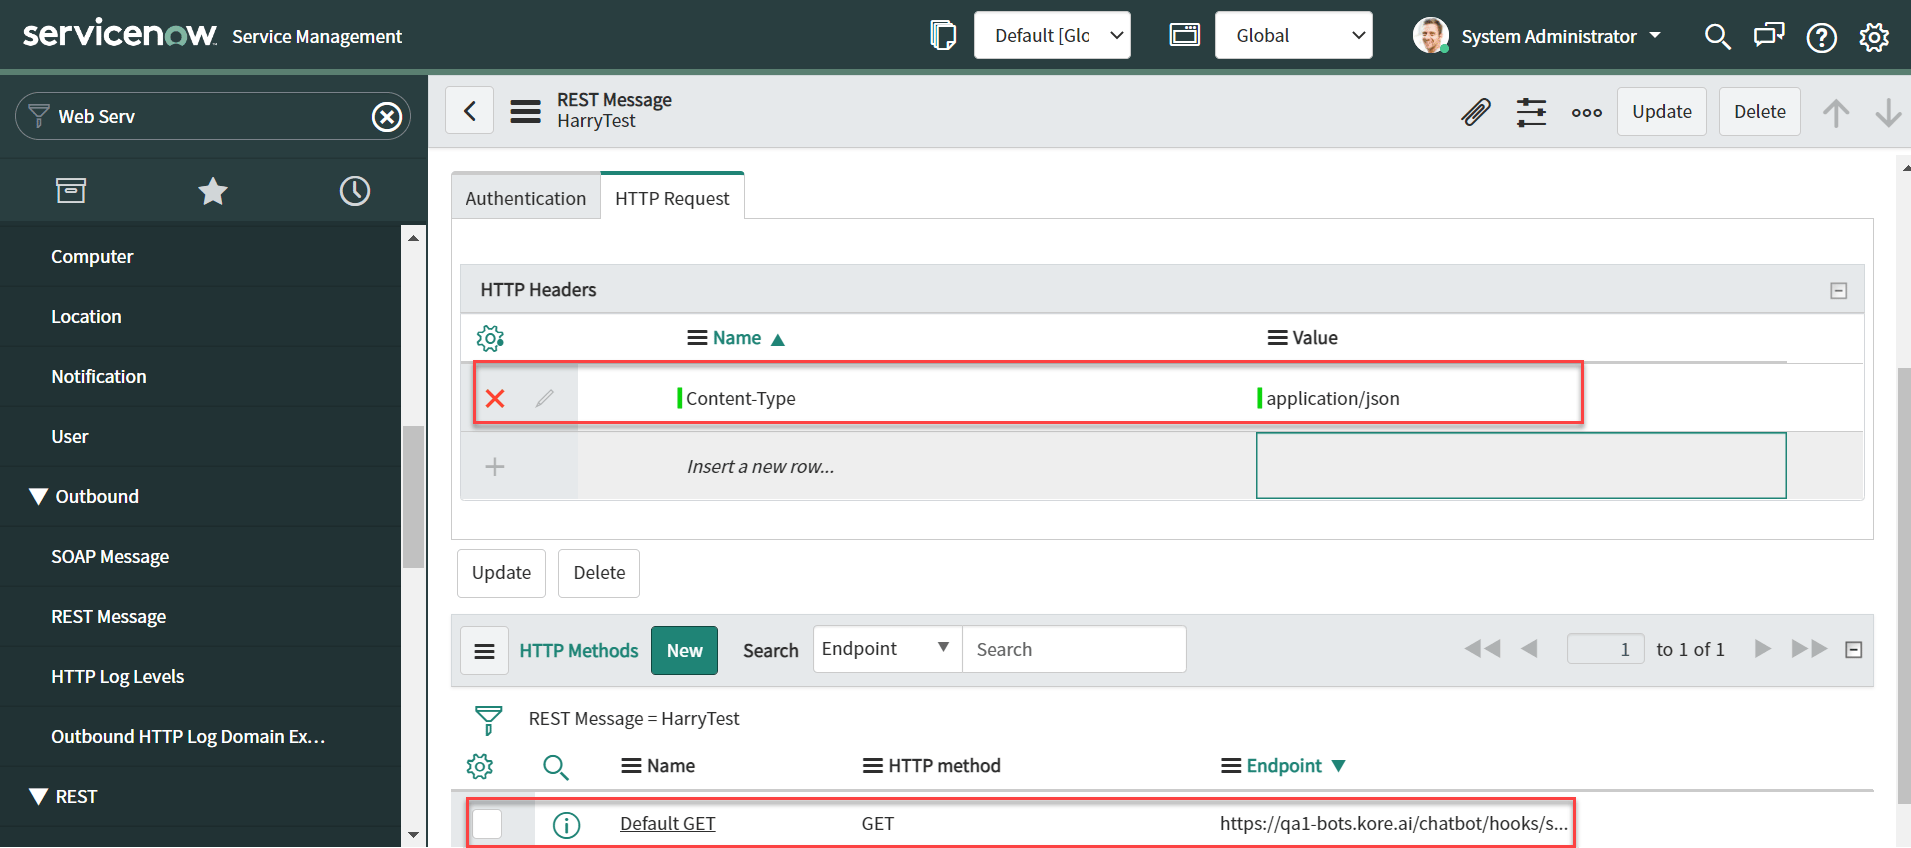 6. Click **Update**.
### Step 10: Define Outbound REST Business Rules
1. Navigate to **System Definition > Business Rules**.
2. Click **New**.
6. Click **Update**.
### Step 10: Define Outbound REST Business Rules
1. Navigate to **System Definition > Business Rules**.
2. Click **New**.
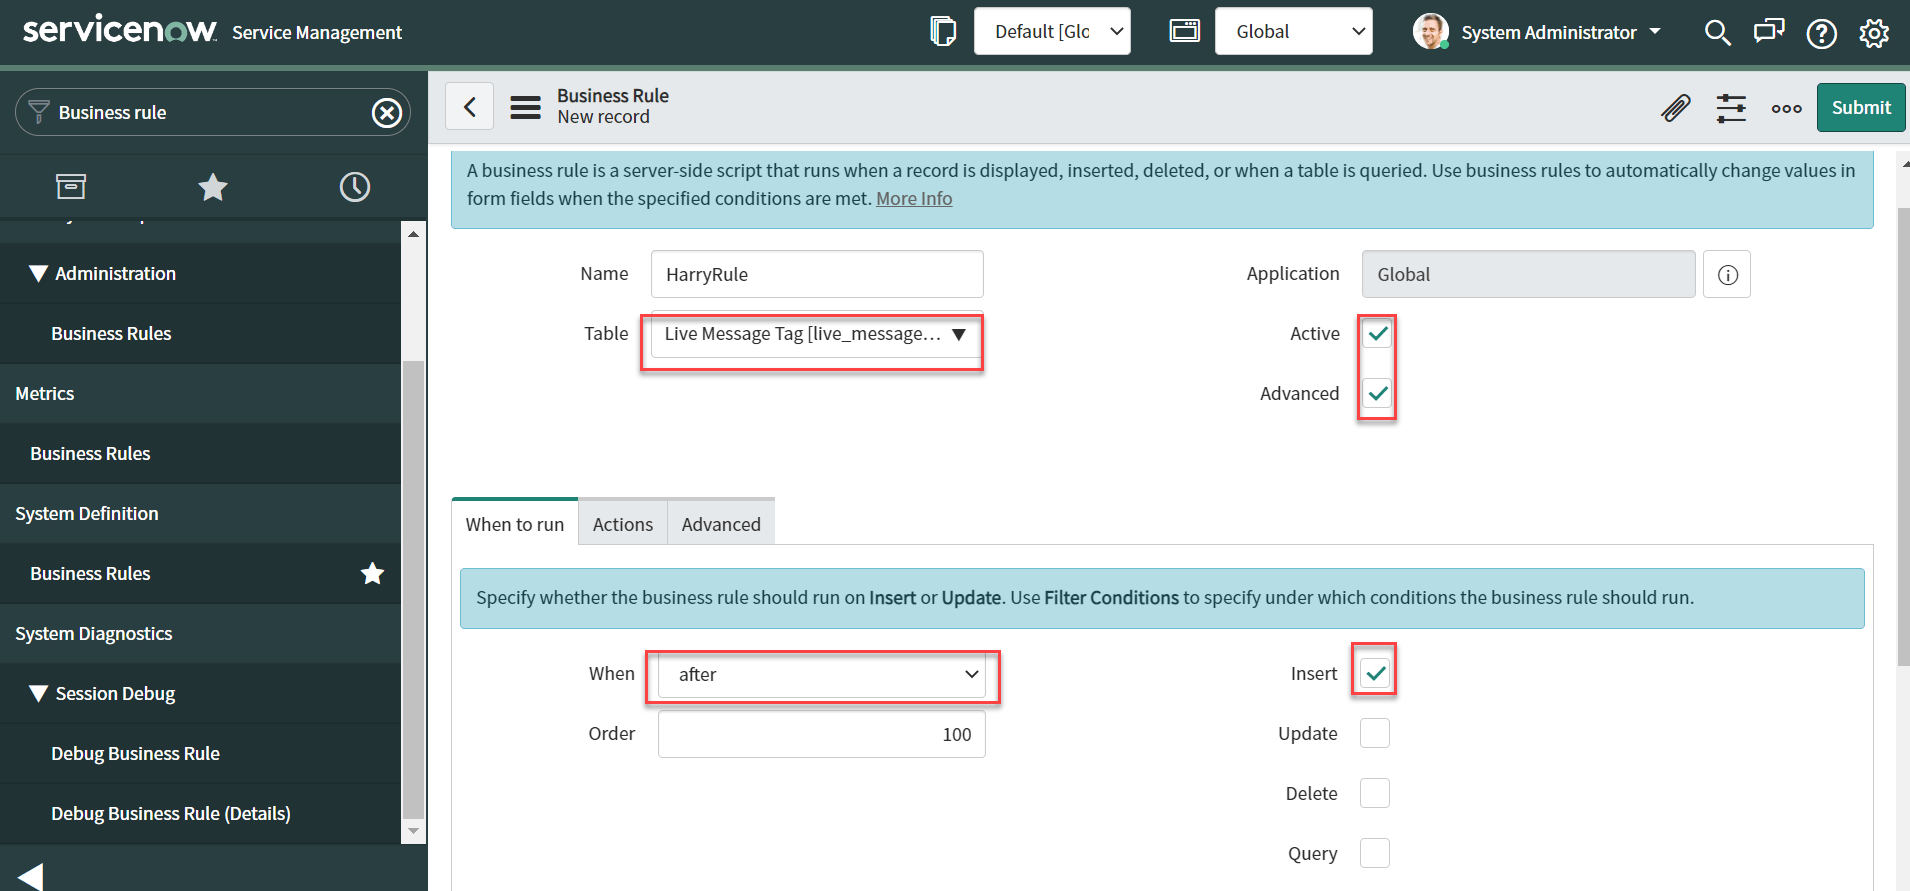
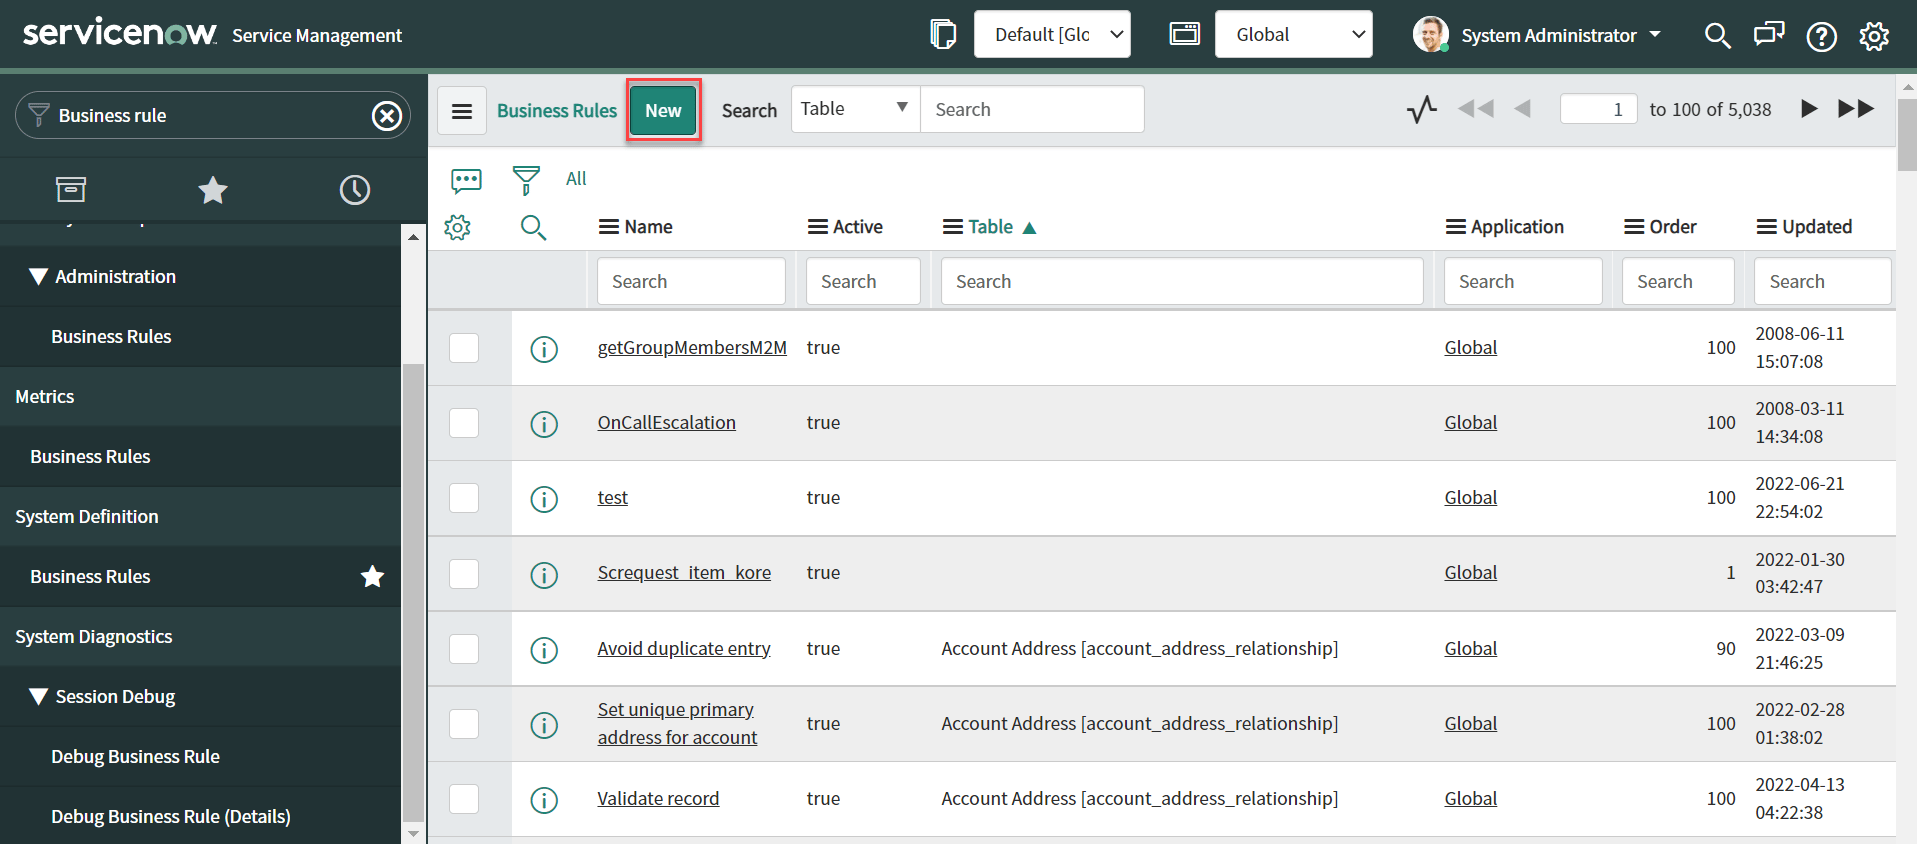 3. Enter the following details:
* **Name**: Enter a name.
* **Table**: Select `live_message`.
* Enable **Active** and **Advanced** checkboxes.
* In the **When to run** tab: set **When** to `after` and select **Insert**.
* Add **Filter conditions**: execute if `created by` isn't `AI Agent_interface`.
3. Enter the following details:
* **Name**: Enter a name.
* **Table**: Select `live_message`.
* Enable **Active** and **Advanced** checkboxes.
* In the **When to run** tab: set **When** to `after` and select **Insert**.
* Add **Filter conditions**: execute if `created by` isn't `AI Agent_interface`.
 4. On the **Advanced** tab, add the following code and click **Submit**:
```javascript theme={null}
var request;
request = new sn_ws.RESTMessageV2('Platform - Agent Integrations', 'Platform - Agent Integrations');
request.setRequestBody("{\"group\":\""+current.group+"\","formatted_message\":\""+GlideStringUtil.escapeForHomePage(current.formatted_message)+"\","sys_created_by\":\""+current.sys_created_by+"\",\"last_message\":\""+current.last_message+"\","sys_id\":\""+current.sys_id+"\"}");
request.setRequestHeader("Content-Type", "application/json");
var response = request.execute();
```
This code is optional. Use it if you encounter issues during execution. This business rule executes the API configured in the REST Message.
### Step 11: Testing Configuration
1. Open the AI Agent with ServiceNow enabled.
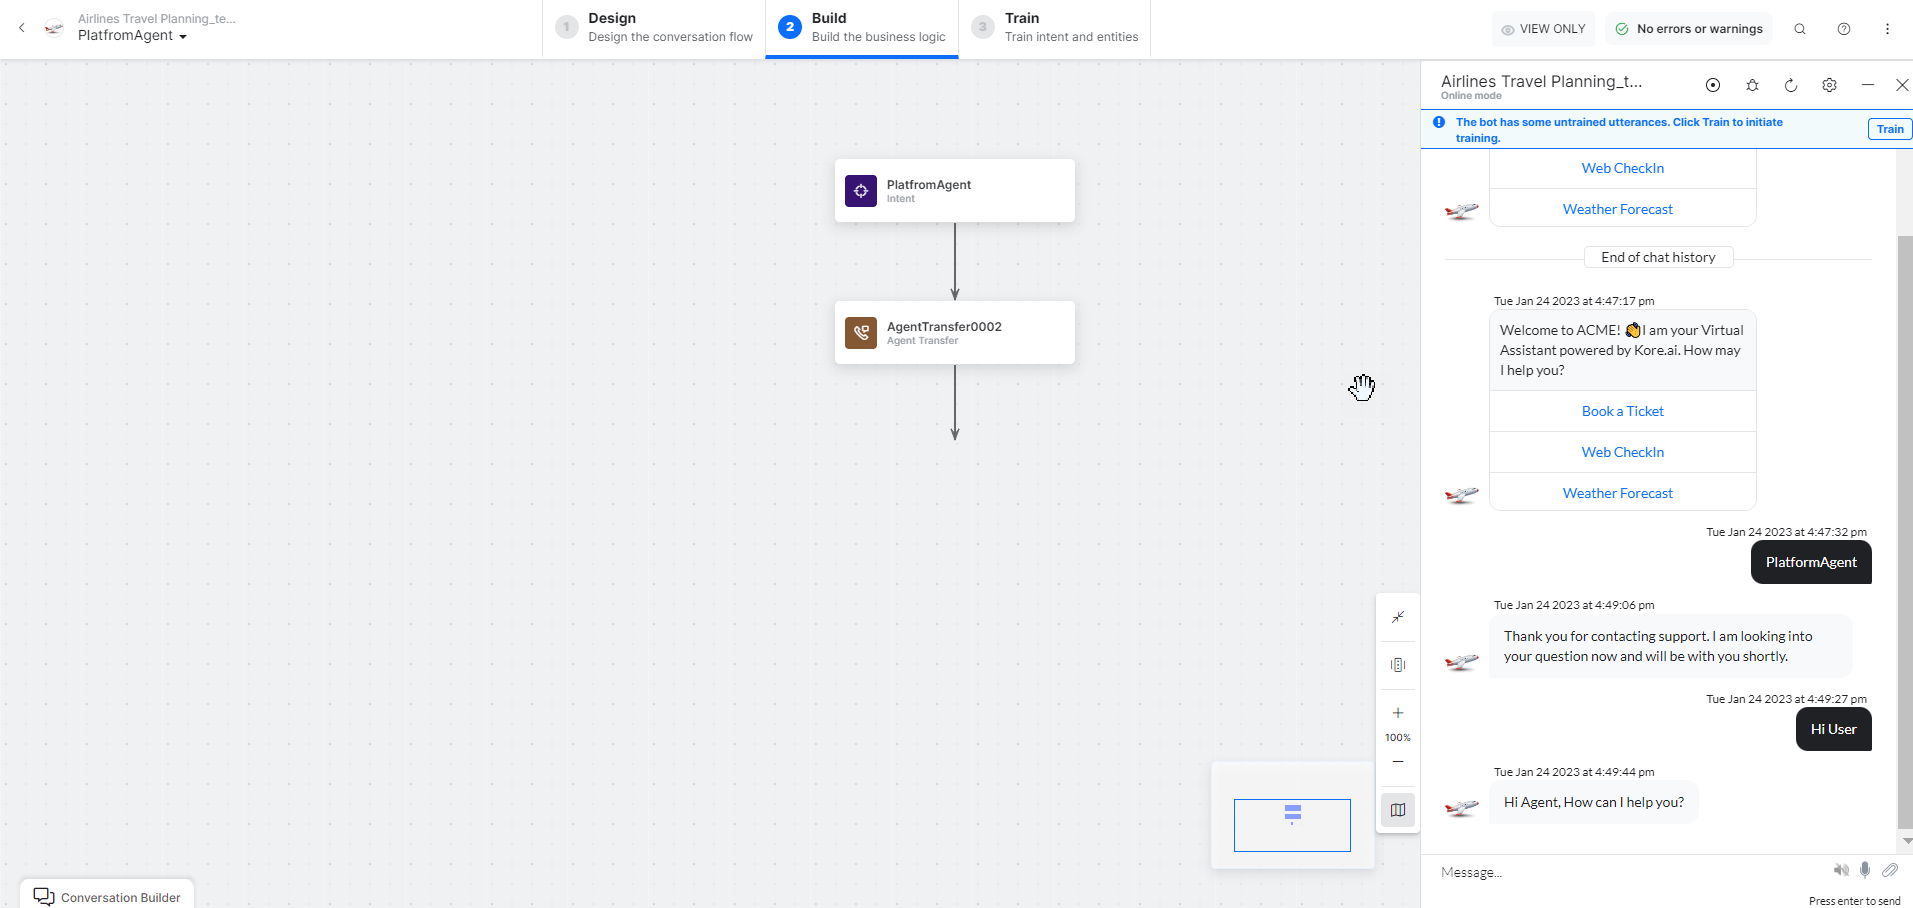
2. Create an Agent Transfer Node task (for example, `Platform Agent` with a `UserAgent` node). See [Agent Transfer Node](/ai-for-service/automation/dialogs/node-types/agent-transfer-node).
4. On the **Advanced** tab, add the following code and click **Submit**:
```javascript theme={null}
var request;
request = new sn_ws.RESTMessageV2('Platform - Agent Integrations', 'Platform - Agent Integrations');
request.setRequestBody("{\"group\":\""+current.group+"\","formatted_message\":\""+GlideStringUtil.escapeForHomePage(current.formatted_message)+"\","sys_created_by\":\""+current.sys_created_by+"\",\"last_message\":\""+current.last_message+"\","sys_id\":\""+current.sys_id+"\"}");
request.setRequestHeader("Content-Type", "application/json");
var response = request.execute();
```
This code is optional. Use it if you encounter issues during execution. This business rule executes the API configured in the REST Message.
### Step 11: Testing Configuration
1. Open the AI Agent with ServiceNow enabled.
2. Create an Agent Transfer Node task (for example, `Platform Agent` with a `UserAgent` node). See [Agent Transfer Node](/ai-for-service/automation/dialogs/node-types/agent-transfer-node).
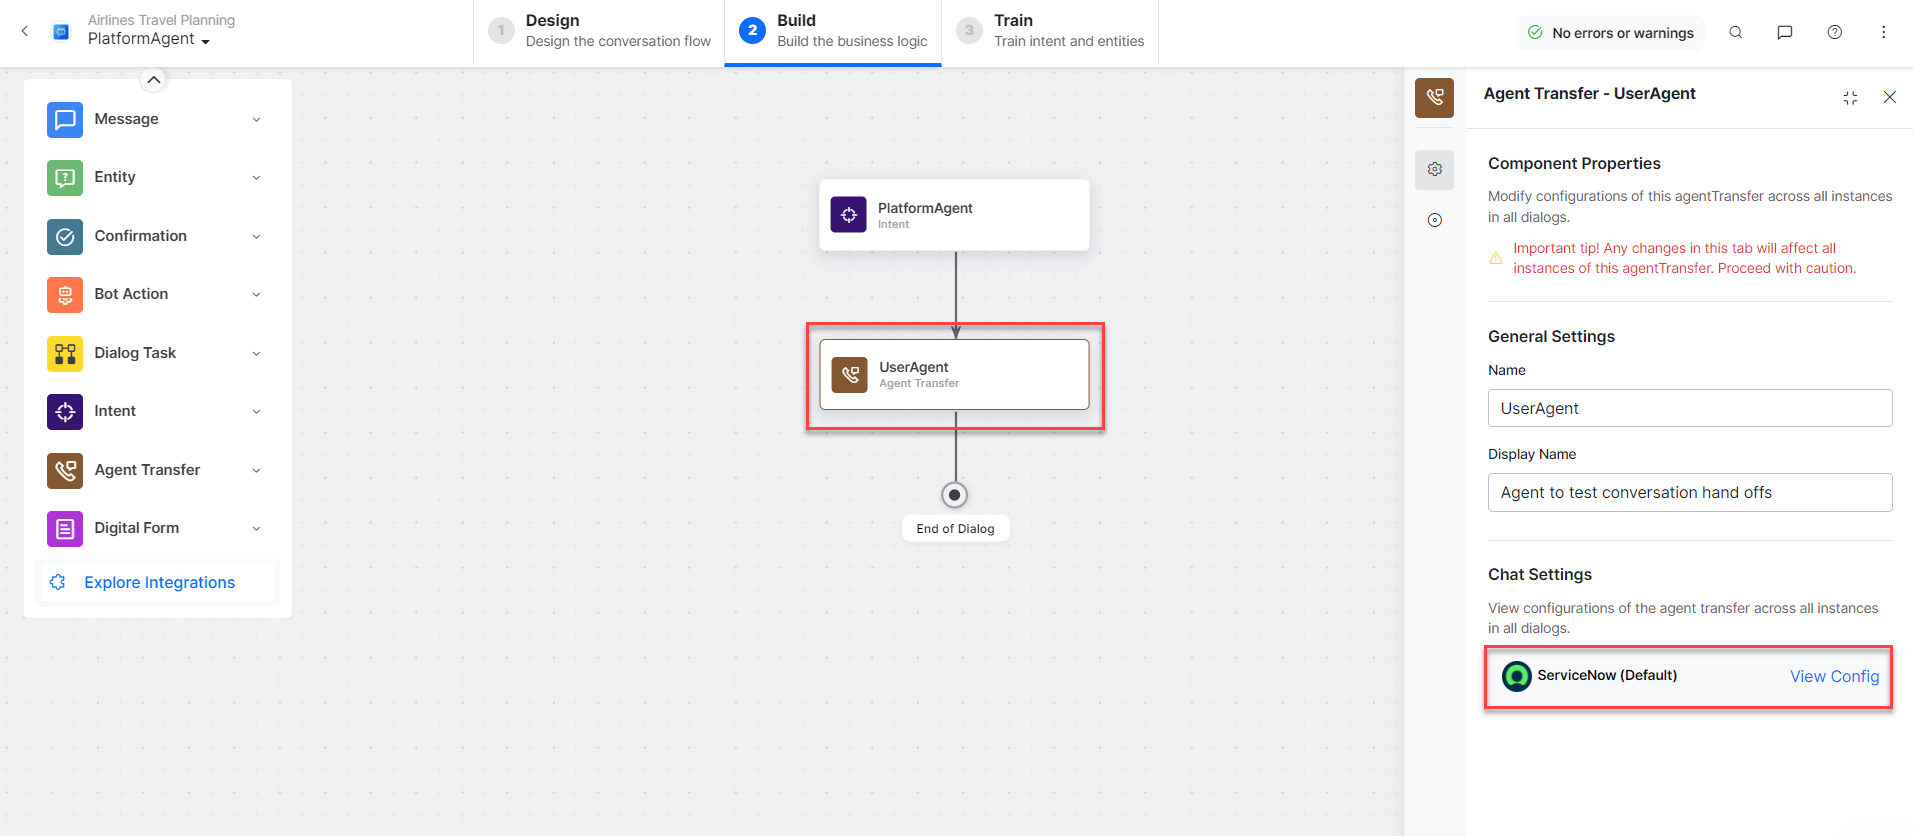 3. Click **Talk to Bot** and enter **Help**.
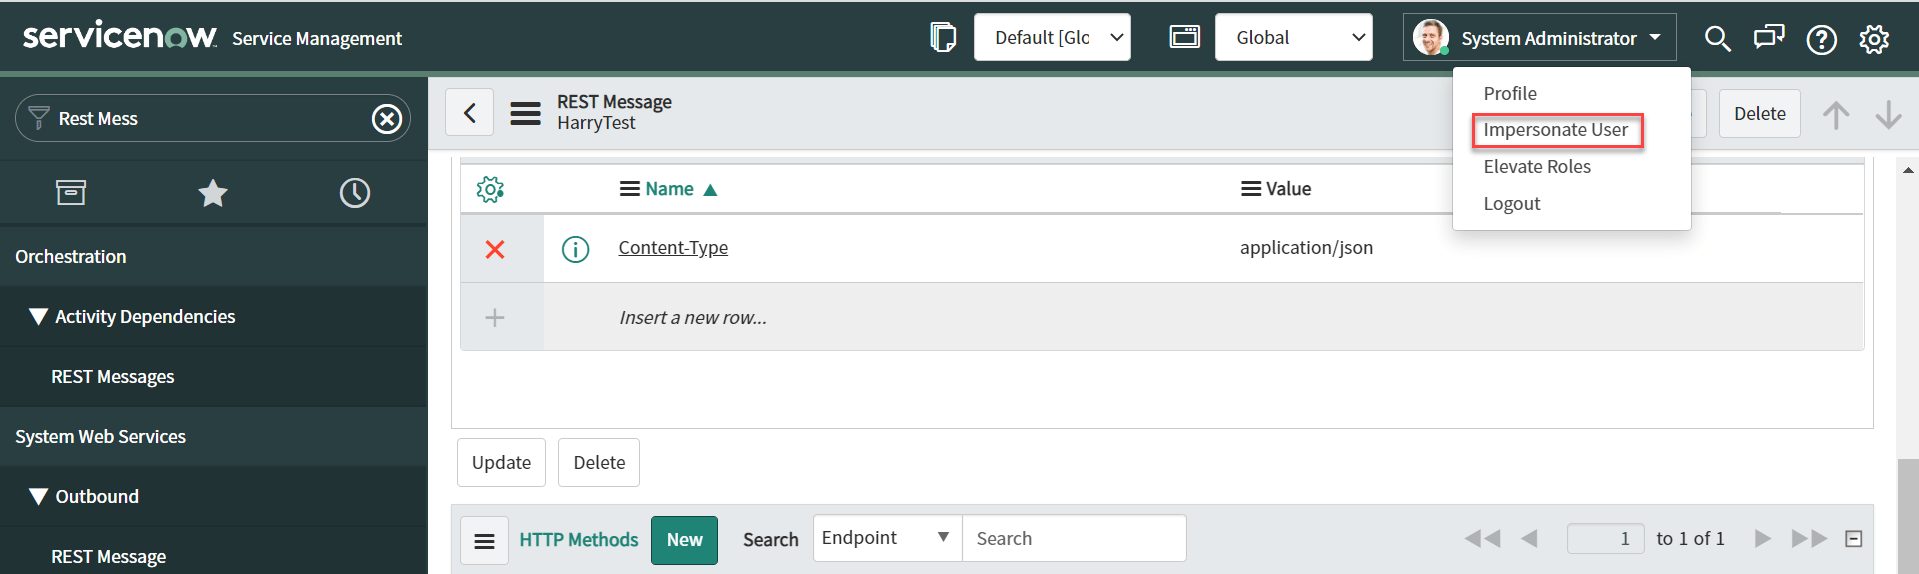
4. Log in to ServiceNow, go to **Profile**, and select **Impersonate User**.
3. Click **Talk to Bot** and enter **Help**.
4. Log in to ServiceNow, go to **Profile**, and select **Impersonate User**.
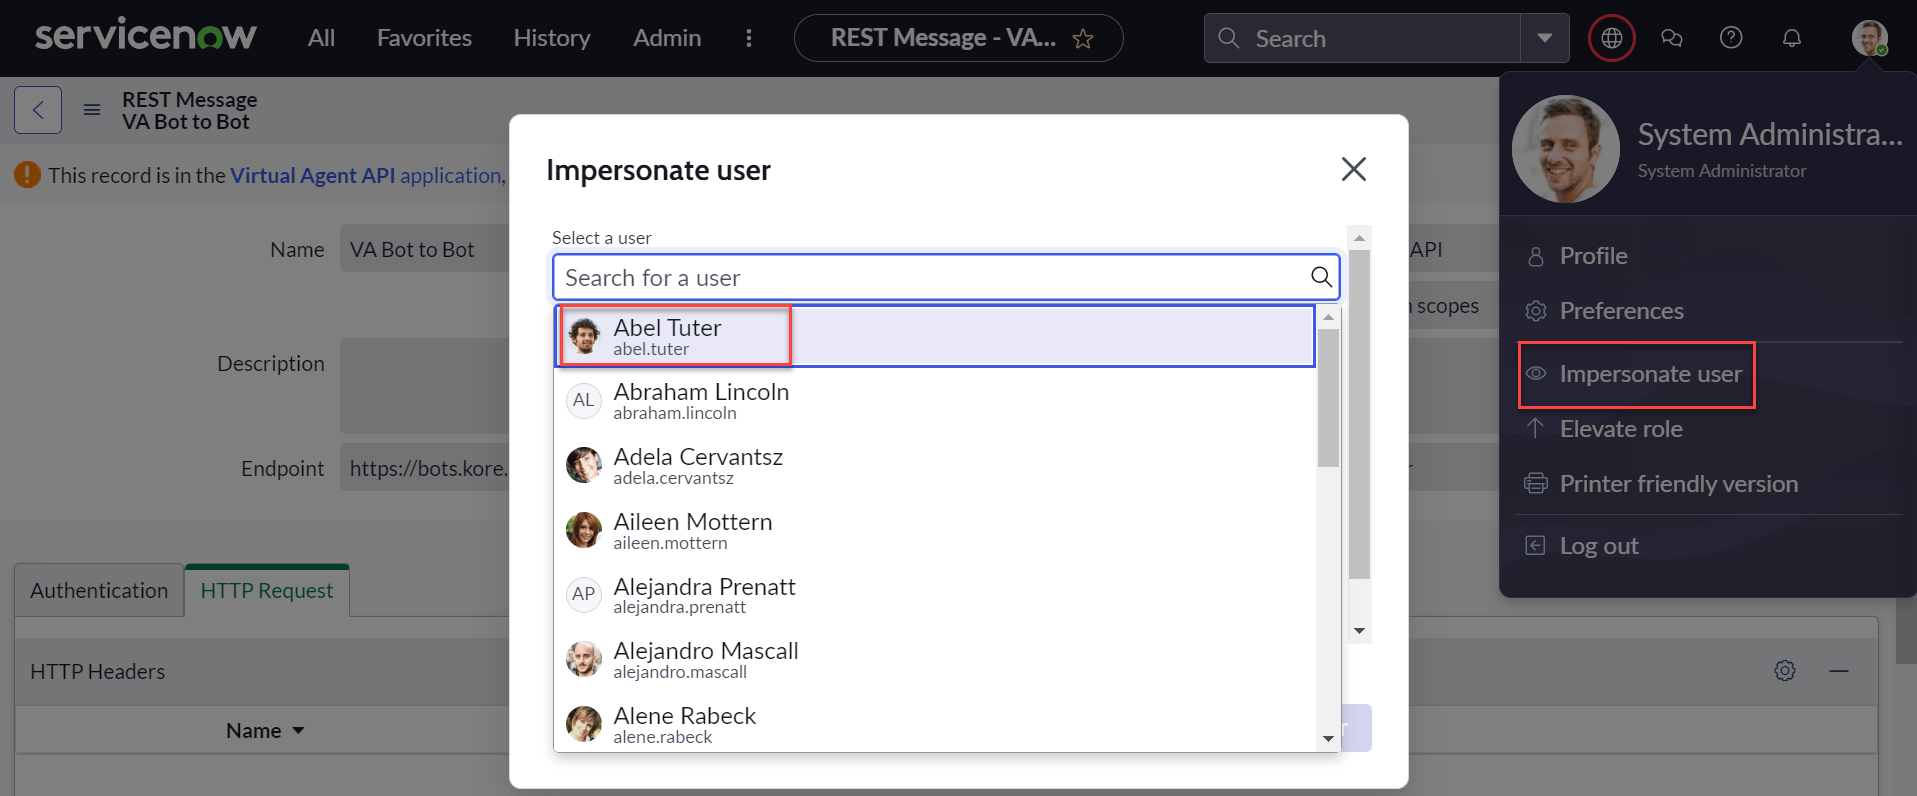
 5. Select the username created (for example, `Abel Tuter`).
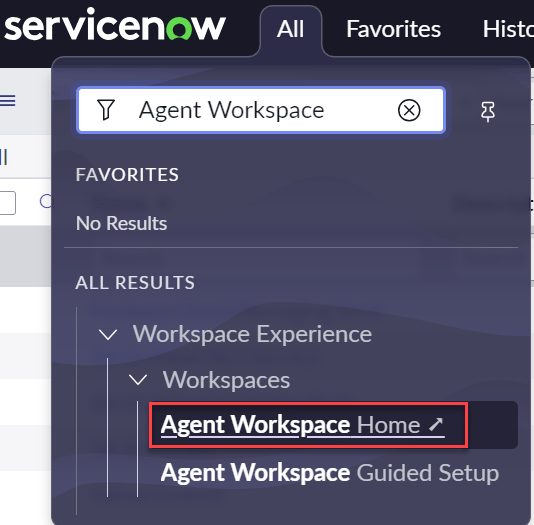
 6. Navigate to **Workspace Experience > Workspaces > Agent Workspace Home**.
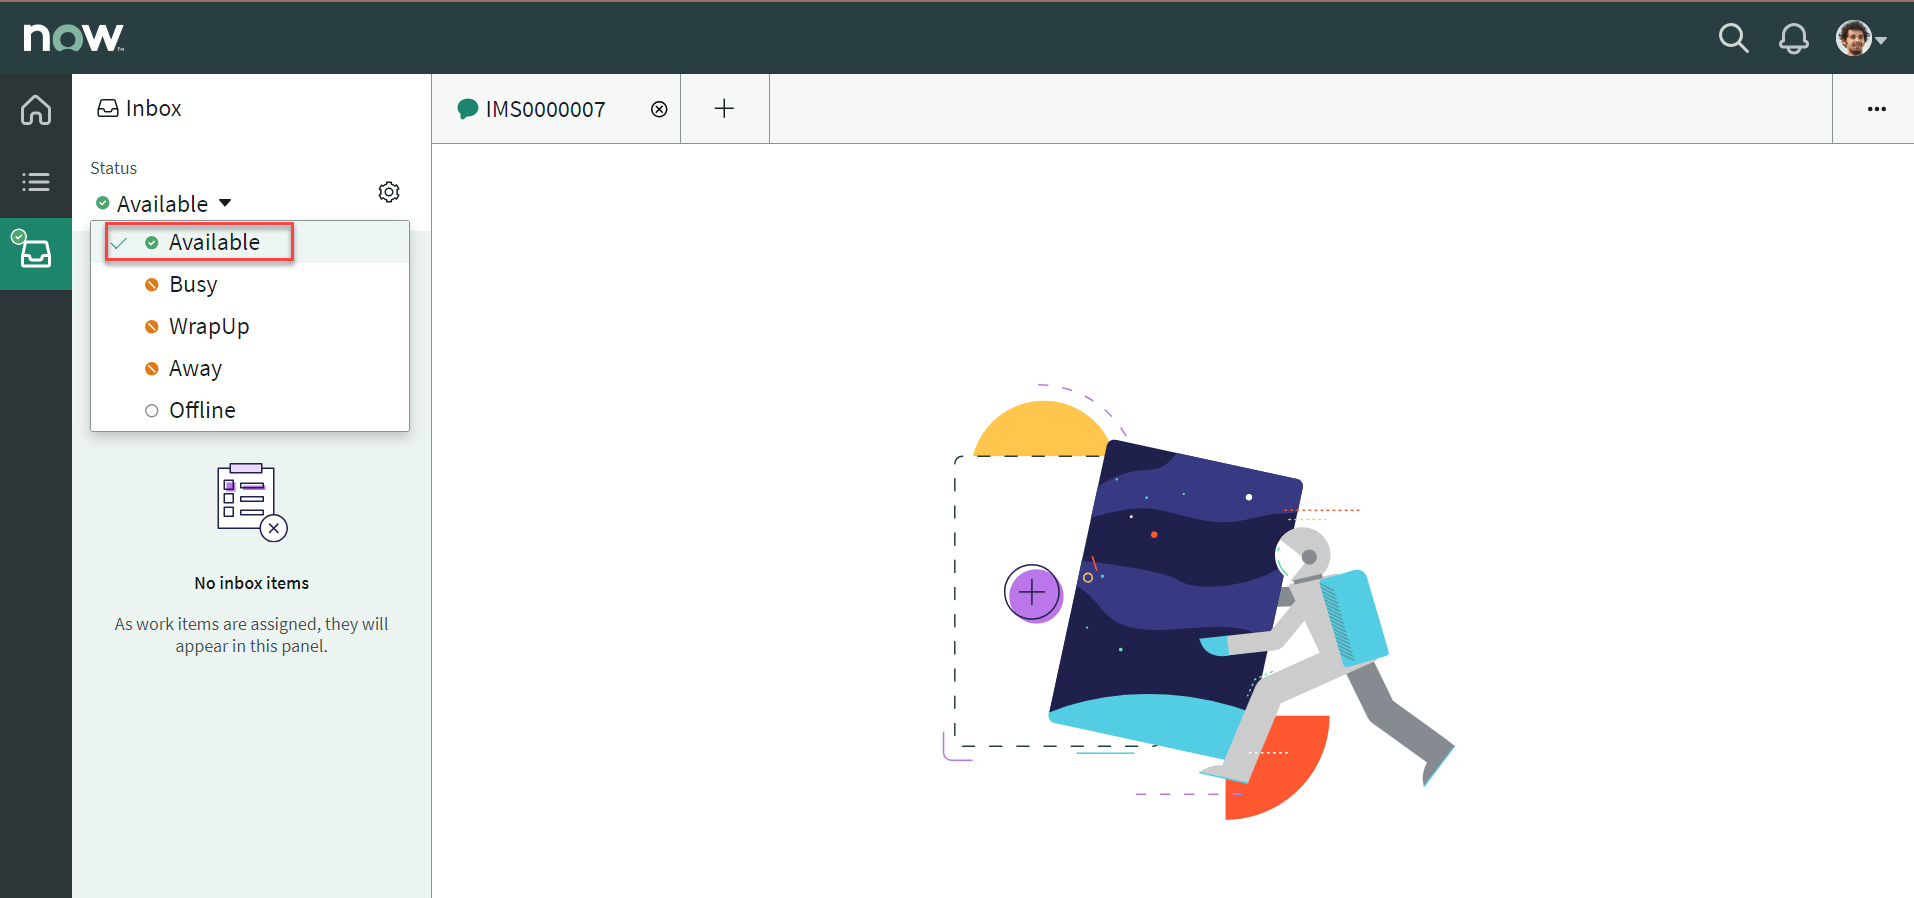
 7. In the Agent Workspace, select **Inbox** and set **Status** to **Available**.
 8. When the user initiates chat, the conversation transfers to the ServiceNow agent and the connection is established.
 ***
## Additional Capabilities
### Enable Attachment Sharing with Live Agents
1. Log in to ServiceNow with admin credentials.
2. Navigate to **System Properties > sys\_cs\_provider\_application.list > Configure > Form Layout**.
3. In the **Trusted Media Domains** field, enter the domain for sending and receiving attachments.
***
## Additional Capabilities
### Enable Attachment Sharing with Live Agents
1. Log in to ServiceNow with admin credentials.
2. Navigate to **System Properties > sys\_cs\_provider\_application.list > Configure > Form Layout**.
3. In the **Trusted Media Domains** field, enter the domain for sending and receiving attachments.
 This feature supports only Tokyo versions.
### Agent Transfer Status
The platform records agent transfer status in Debug Logs and Analytics, enabling tracking and troubleshooting of transfer-related issues.
### Failed Agent Transfer Notification
When a ServiceNow agent transfer fails due to agent unavailability, users see a default non-editable message:
*No agents are available to handle your request. Please try again later.*
This feature supports only Tokyo versions.
### Agent Transfer Status
The platform records agent transfer status in Debug Logs and Analytics, enabling tracking and troubleshooting of transfer-related issues.
### Failed Agent Transfer Notification
When a ServiceNow agent transfer fails due to agent unavailability, users see a default non-editable message:
*No agents are available to handle your request. Please try again later.*