

Add a Custom Prompt
Prerequisites
Integrate a pre-built or custom LLM before creating a prompt. See LLM Integration.Steps
- Go to Generative AI Tools > Prompts Library.
- Click + New Prompt (top right).
-
Enter the Prompt Name, then select the Feature and Model.
.png?fit=max&auto=format&n=gjVE-XYJ79Rt43Ek&q=85&s=1160848648692eddf2af8edc7788b5fe)
-
The Configuration section (endpoint URL, auth, headers) is auto-populated from the model integration and is read-only.
.png?fit=max&auto=format&n=gjVE-XYJ79Rt43Ek&q=85&s=2bd60c52d45c3793f6d513e186055ab6)
-
In the Request section, create a prompt or import an existing one.
.png?fit=max&auto=format&n=gjVE-XYJ79Rt43Ek&q=85&s=b3c45d7489e9a7a47f5086c4b2910770)
-
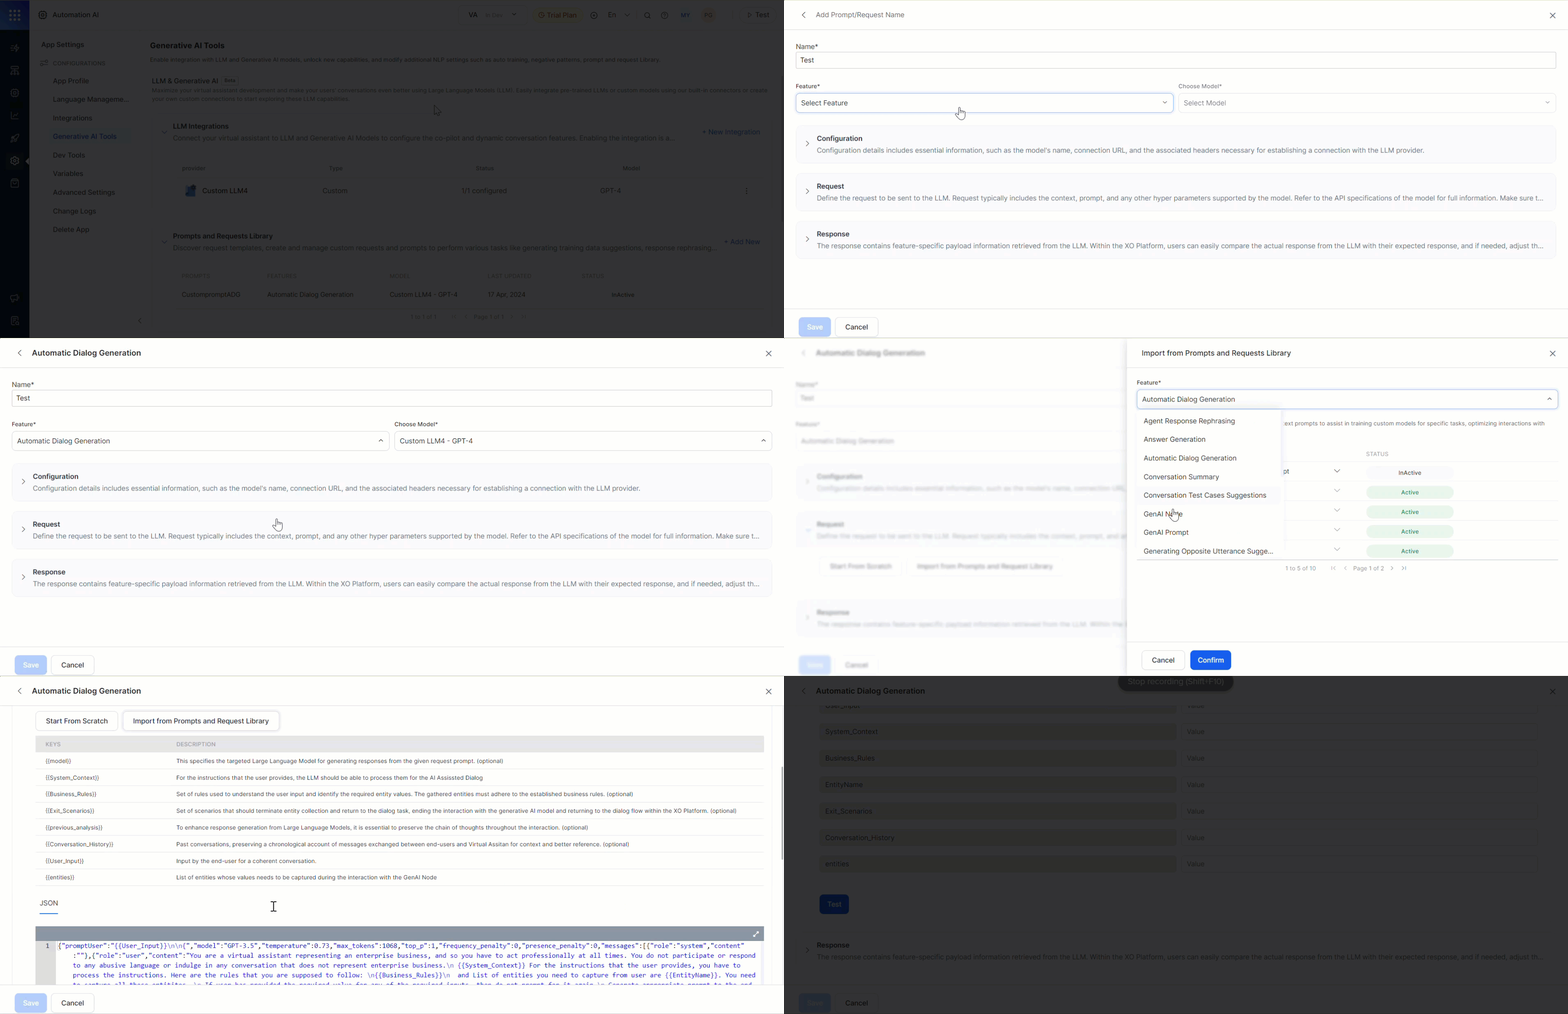
Click Import from Prompts and Requests Library.
-
Select the Feature, Model, and Prompt. Hover and click Preview Prompt to review before importing.
You can interchange prompts between features.
- Click Confirm to import the prompt into the JSON body.
.png?fit=max&auto=format&n=gjVE-XYJ79Rt43Ek&q=85&s=552bccfa6e27e38c62ca3ef92b9c08d7)
-
Click Import from Prompts and Requests Library.
-
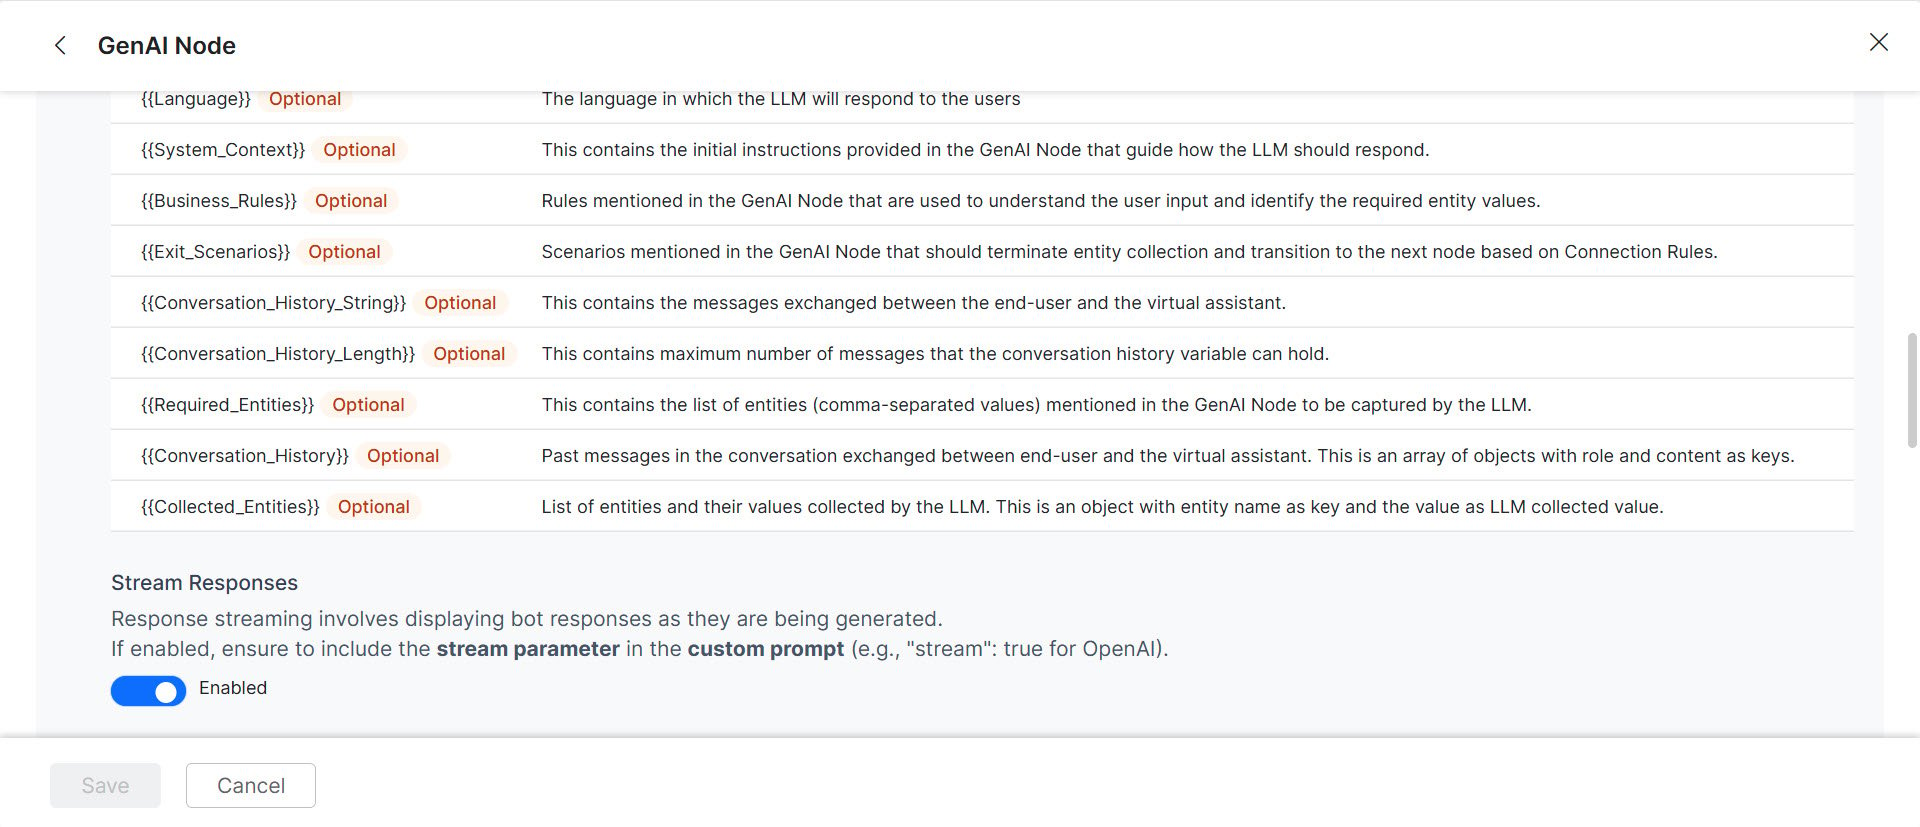
(Optional) Toggle Stream Response to enable streaming. Responses are sent incrementally in real time instead of waiting for the full response.
- Add
"stream": trueto the custom prompt when streaming is enabled. The saved prompt displays a “streaming” tag. - Enabling streaming disables the “Exit Scenario” field. Streaming applies only to Agent Node and Prompt Node features using OpenAI and Azure OpenAI models.
-
Fill in the Sample Context Values and click Test. If successful, the LLM response is displayed; otherwise an error appears. See Dynamic Variables
.png?fit=max&auto=format&n=gjVE-XYJ79Rt43Ek&q=85&s=18929bfd2a304dce0667e9f54aafd0aa)
-
Map the response key: In the JSON response, double-click the key that holds the relevant information (for example,
content). The Platform generates a Response Path for that location. Click Save.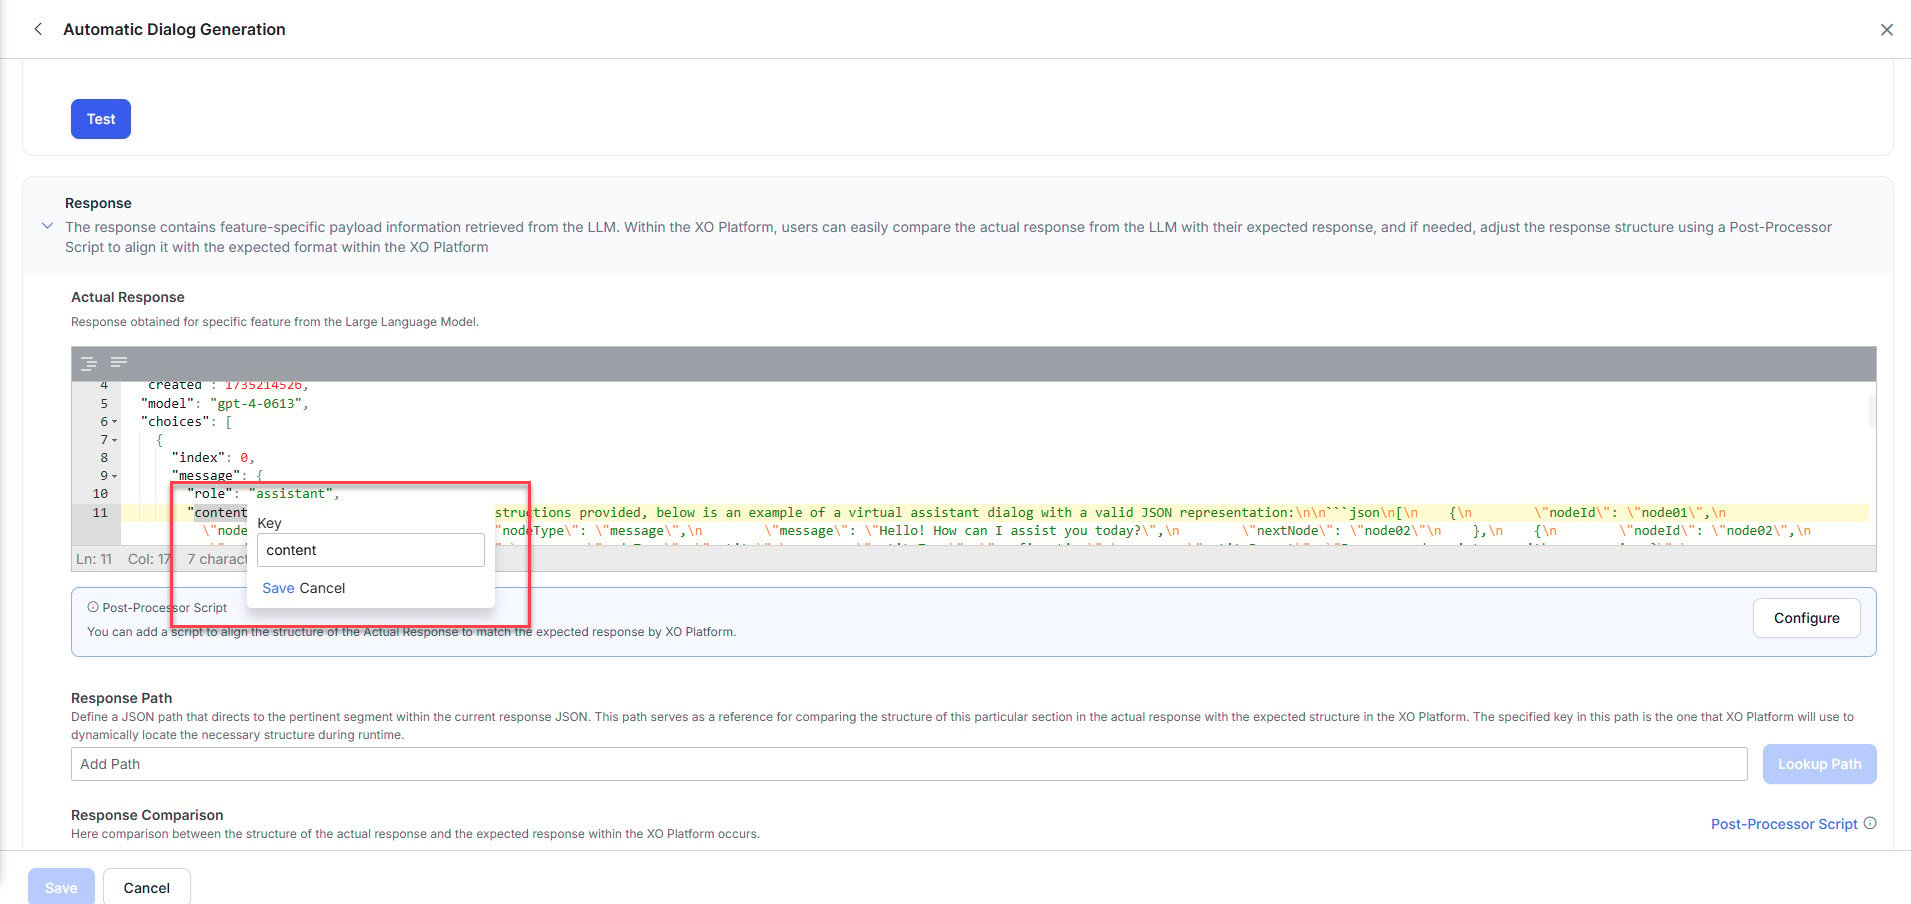
-
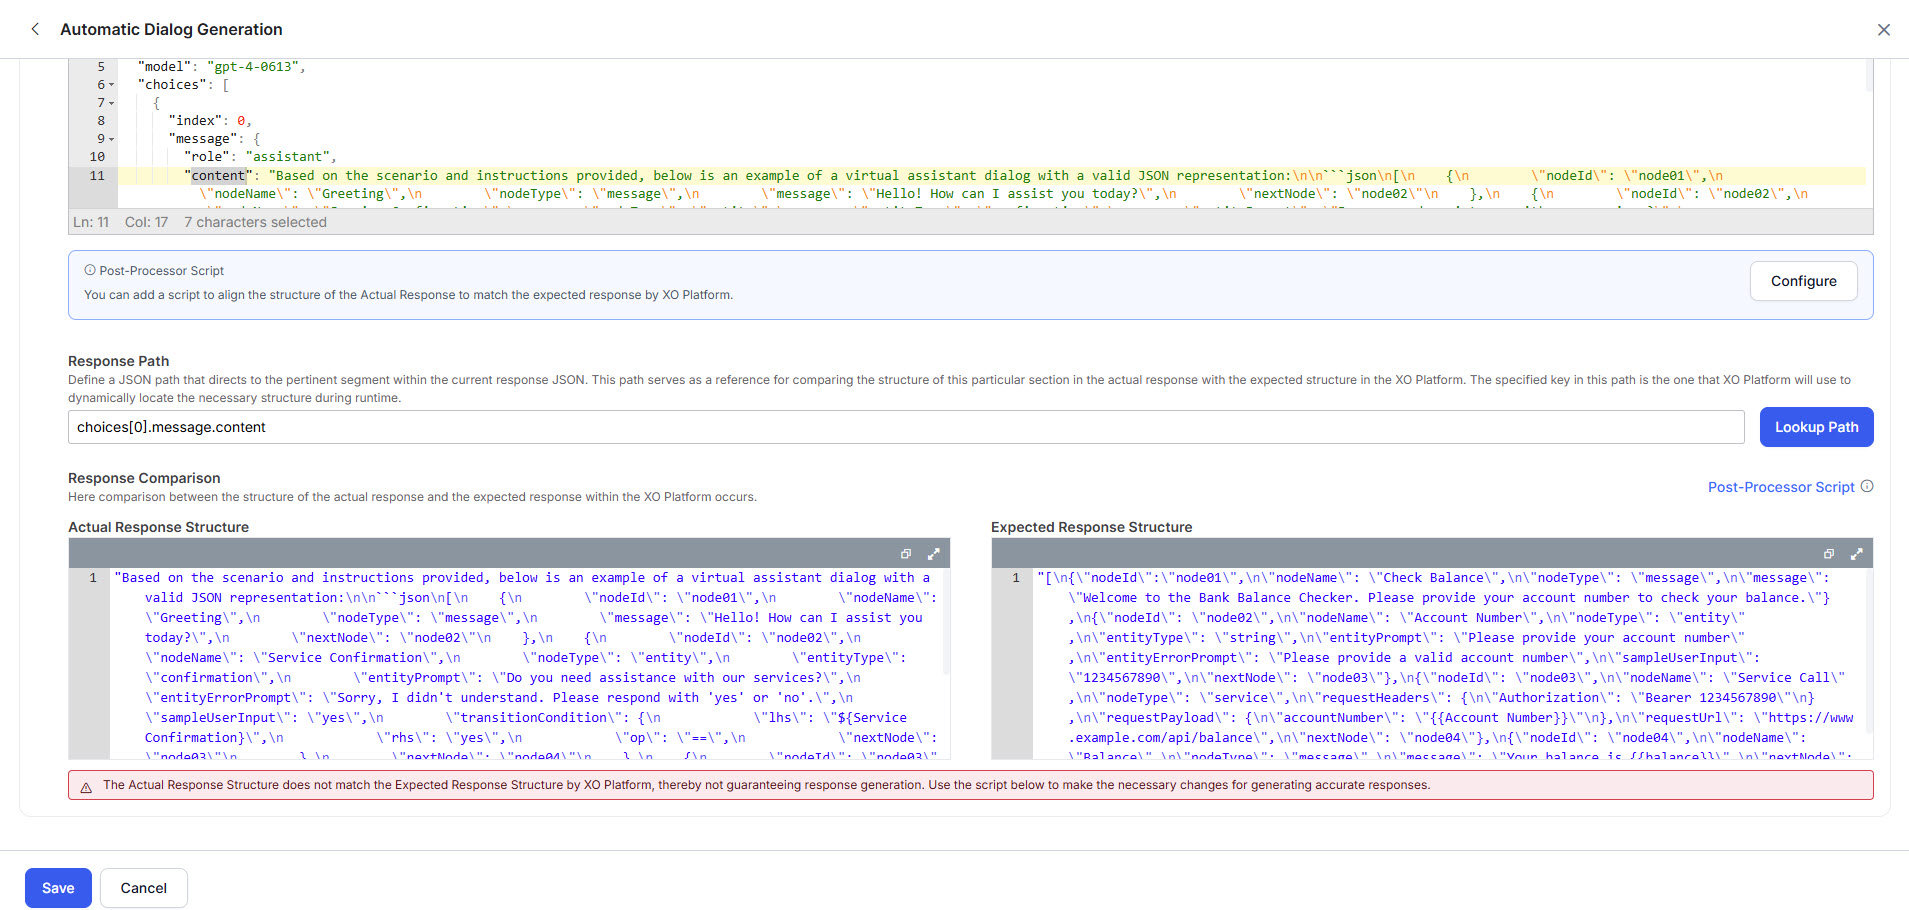
Click Lookup Path to validate the path.
-
Review the Actual Response and Expected Response:
-
Green (match): Click Save. Skip to step 12.
.png?fit=max&auto=format&n=gjVE-XYJ79Rt43Ek&q=85&s=fdeba3a13dcf09936bef0a0e7143673c)
-
Red (mismatch): Click Configure to open the Post Processor Script editor.
.png?fit=max&auto=format&n=gjVE-XYJ79Rt43Ek&q=85&s=2f94c2562cece3b1c0dd77117aa03194)
-
Enter the Post Processor Script and click Save & Test.
.png?fit=max&auto=format&n=gjVE-XYJ79Rt43Ek&q=85&s=eed326a9cd190ec7873b8a09323f3099)
-
Verify the result, then click Save. The responses turn green.
.png?fit=max&auto=format&n=gjVE-XYJ79Rt43Ek&q=85&s=2ff527db5d3c3d0ff85f79b80d5b89d6)
-
Enter the Post Processor Script and click Save & Test.
-
Green (match): Click Save. Skip to step 12.
-
(Optional) If Token Usage Limits are enabled for your custom model, map the token keys for accurate tracking:
- Request Tokens key:
usage.input_tokens - Response Tokens key:
usage.output_tokens
 Without this mapping, the Platform can’t calculate token consumption, which may lead to untracked usage and unexpected costs.
 - Request Tokens key:
- Click Save. The prompt appears in the Prompts Library.